Getting Started
The Succinct Platform (opens in a new tab) makes it easy for developers to build and deploy ZKP applications using a variety of proof systems. For any questions, get in touch by filling out this form (opens in a new tab). The platform is still in beta and we are happy to help you get started.
Login with Github
To get started, navigate to the Succinct Platform at https://alpha.succinct.xyz/ (opens in a new tab) and login using your Github account (in the top-right corner) and give the Succinct Github bot permissions to your repositories.
Get Whitelisted (Optional)
All new accounts on the platform by default are only allowed to import a demo repository (to prevent spam/DDOS). You must get whitelisted by the Succinct team be able to import your own repositories. To get whitelisted, fill out this form (opens in a new tab).
Create a new project
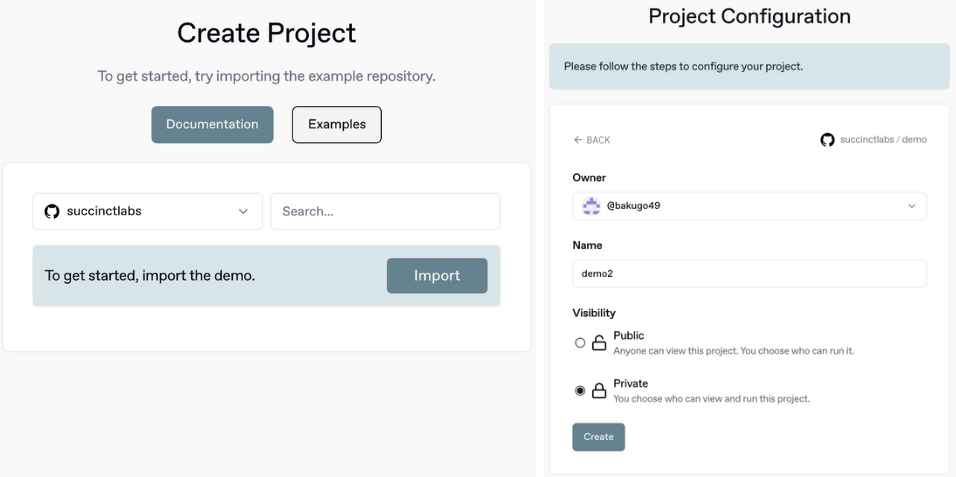
All projects on the Succinct platform are associated with a Github repository. To create a new project:
- Click "New Project" in the left sidebar of the homepage.
- Select which repository you would like to use for your project (by default, accounts that are not whitelisted can only select the demo repository).
- Configure your project's owner, name, and visibility settings (public means everyone will be able to see your project, private means it will only be accessible to you and collaborators).
- Confirm the creation of your project by clicking on "create".
Platform steps
Importing the demo project and walking through the steps will serve as a guide that will demonstrate the end-to-end usage of the platform. The demo repository can be found here (opens in a new tab) and serves as a good reference.
There are 4 steps to using the platform:
- Create a repo with a
succinct.json: Your project repo must include asuccinct.jsonfile that defines the entrypoints for your circuits that our platform can understand. - Creating a release: Generate a versioned build of your circuit artifacts.
- Deploying your verifier onchain: Deploy a onchain verifier smart contract to verify proofs associated with your release.
- Request a proof: Submit proof requests (either onchain or using our API) and have the results delivered to your smart contract.
Import a repo with a succinct.json
The Succinct platform requires a succinct.json file to be present in the root of your repository.
This file is similar to a package.json in a Node.js project, and it defines the entrypoints for your circuits that our platform can understand during building and proving time.
An example succinct.json for the demo repository can be found here (opens in a new tab):
{
    "$schema": "https://raw.githubusercontent.com/succinctlabs/succinctx/main/assets/schema.json",
    "entrypoints": [
        {
            "name": "succinct-alpha-demo",
            "framework": "plonky2x",
            "baseDir": ".",
            "buildCommand": "cargo run --package succinct-alpha-demo --release build && mv ./target/release/succinct-alpha-demo ./build/succinct-alpha-demo",
            "proveCommand": "RUST_LOG=debug ./build/succinct-alpha-demo prove input.json"
        }
    ]
}entrypointsis a list of entrypoints that define the circuits associated with your project. Each entry in this list should correspond to a circuit in your project.nameis the name of the circuit.frameworkis the proving framework used to build and prove the circuit. The platform currently supportsplonky2x.baseDiris the base directory of the project.buildCommandis the command to build the circuit. This command should generate the circuit binary in thebuilddirectory. The platform will run this command exactly and will save the contents of thebuilddirectory as circuit artifacts.proveCommandis the command the platform will use to generate proofs. This command should take an input fileinput.jsonand generate a proof, assuming that the proof is stored in a file calledoutput.json. The platform will run this command exactly and will save the contents of theproofdirectory as proof artifacts.
plonky2x example repos
Right now our platform has 1st class support for plonky2x (opens in a new tab), a wrapper library around plonky2 maintained by Succinct
that makes it easy to build circuits that are compatible with our platform. We have several example repos that use plonky2x that can serve as a helpful reference for your project:
- Demo repository: https://github.com/succinctlabs/demo (opens in a new tab)
- ZK Tendermint Light Client: https://github.com/succinctlabs/tendermintx (opens in a new tab)
- ZK GRANDPA Light Client (Substrate): https://github.com/succinctlabs/vectorx (opens in a new tab)
To learn more about plonky2x, you can watch this video (opens in a new tab).
Create a release
Once you have imported your repository, you can create a release, which will run the buildCommand in your succinct.json to build your circuit and save the circuit artifacts that will be needed at proof generation time.
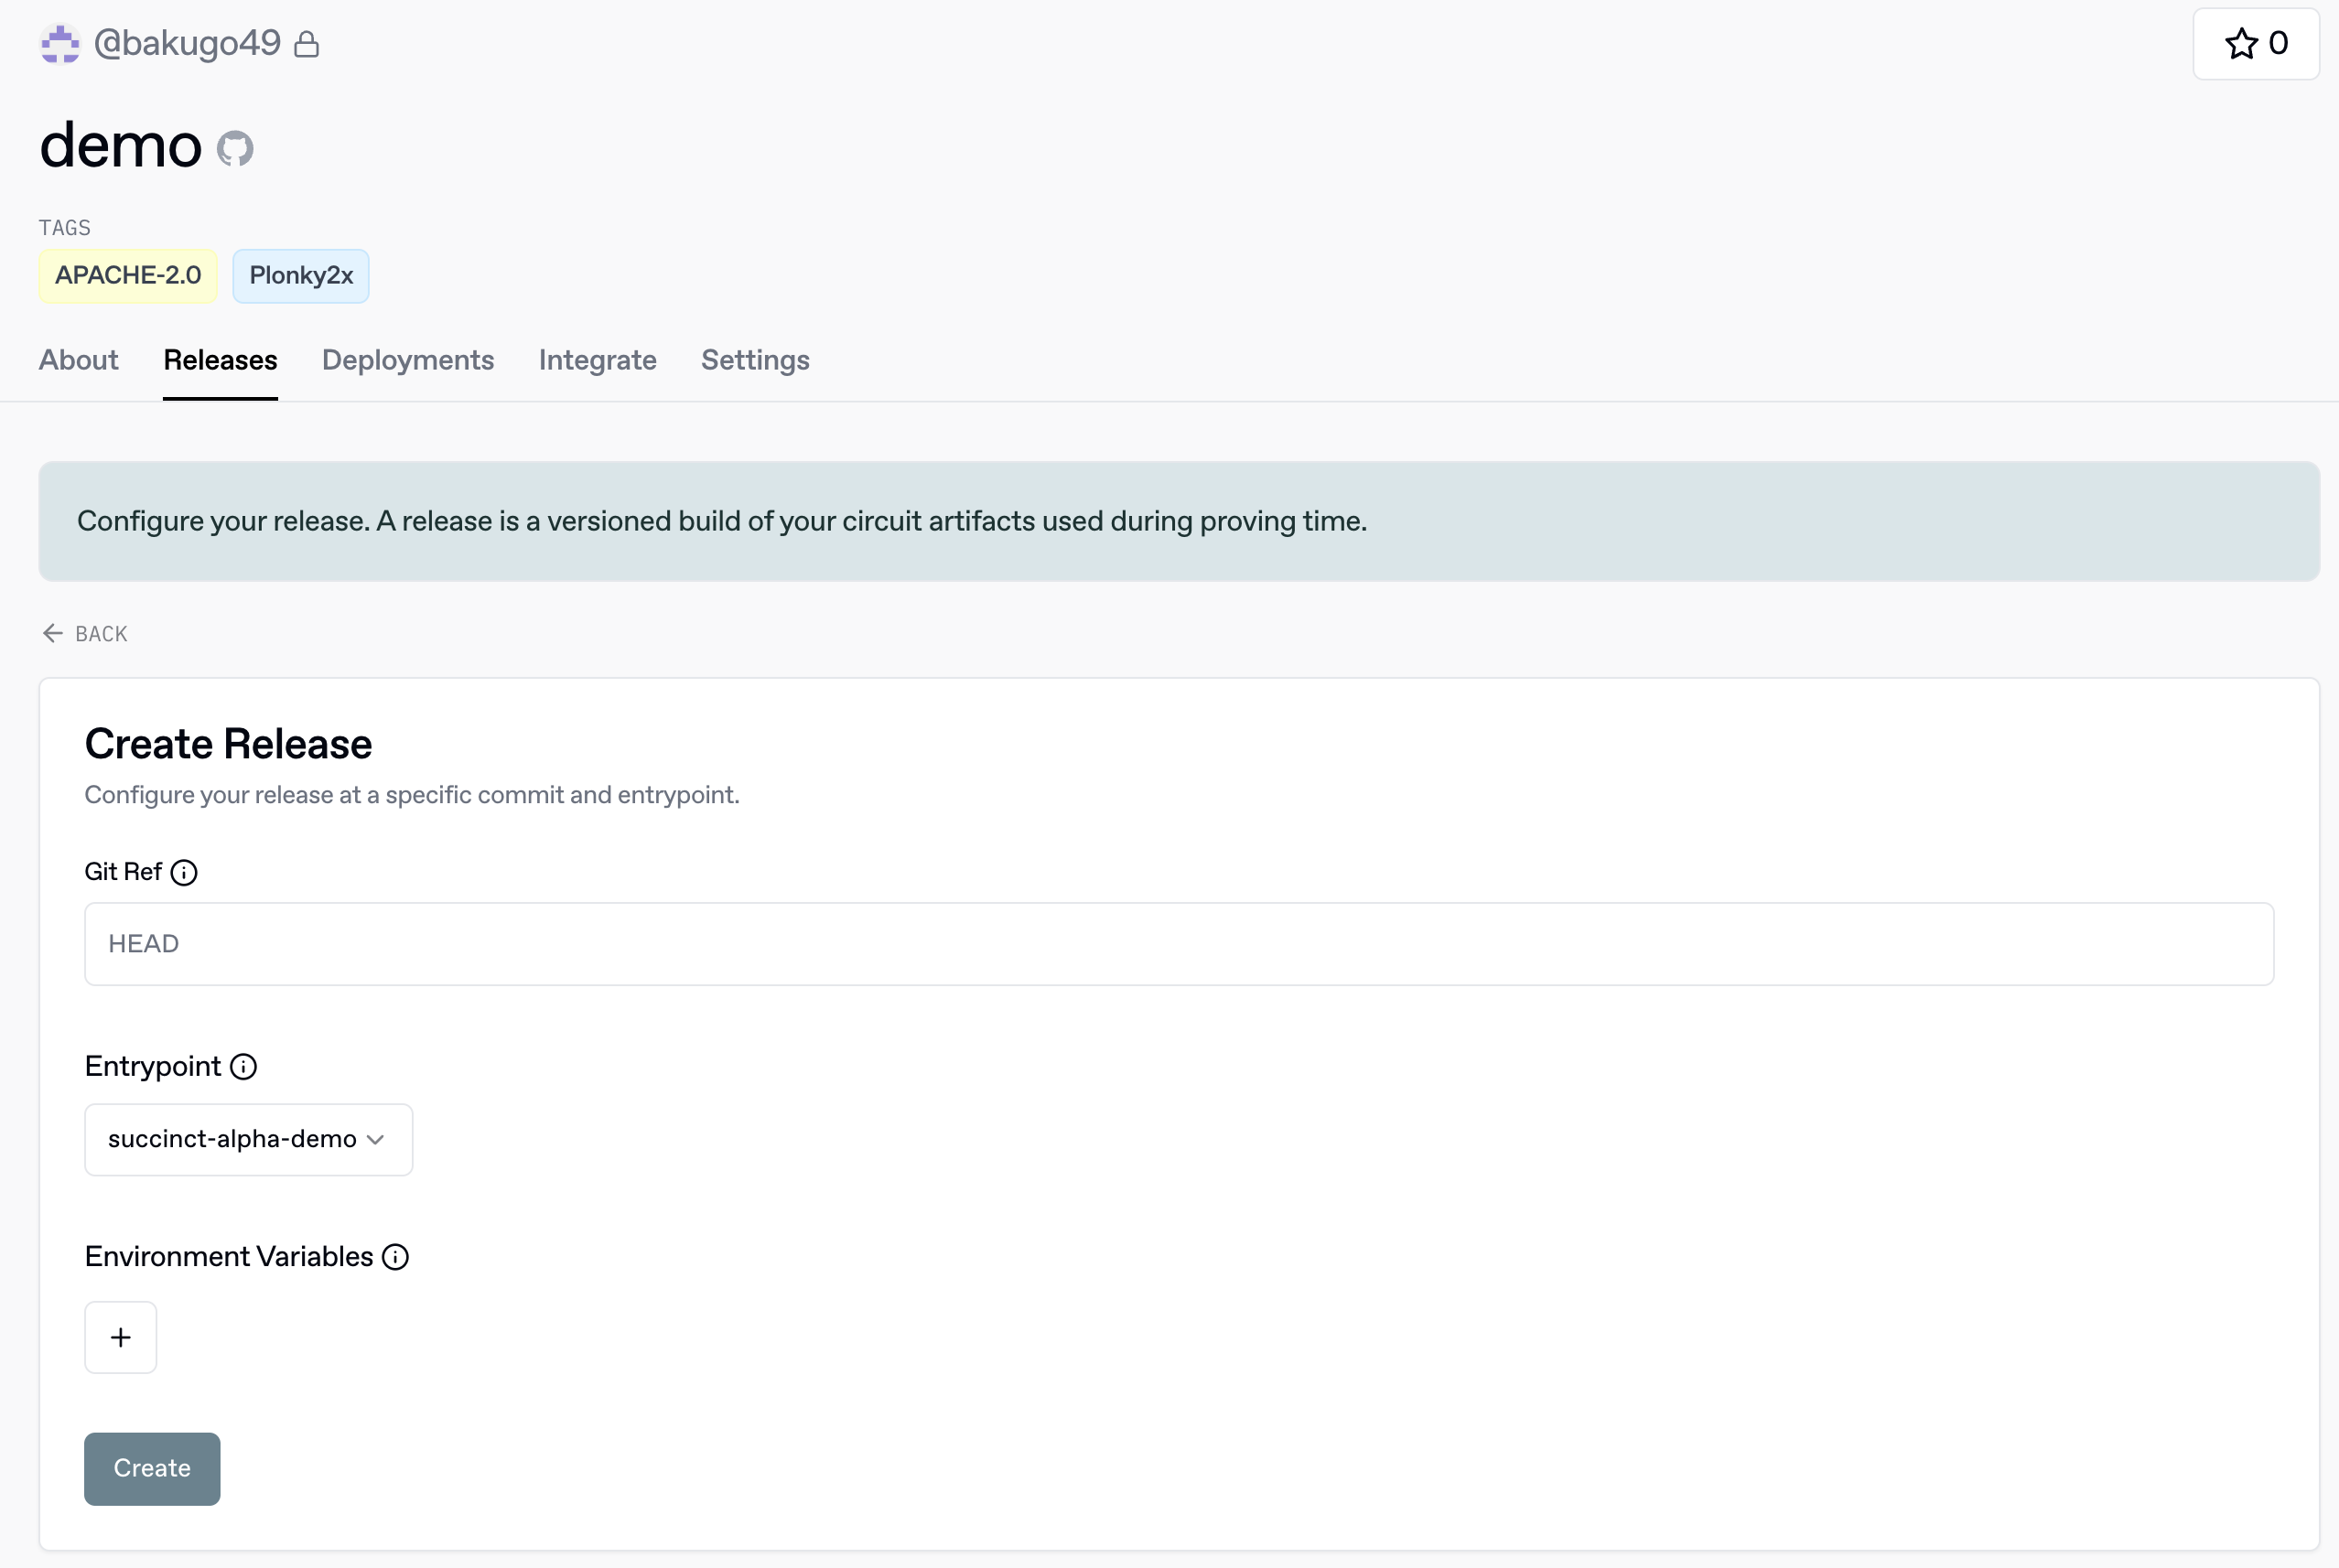
When creating a release, you can configure it with the following options:
- Git Ref: Git commit hash, branch name, or tag to use for the build. This is helpful if you want to build a specific version of your circuits on a development branch as an example.
- Entrypoint: Select from the avaliable entrypoints defined in
succinct.jsonto specify which circuit to build. - Environment variables: Add environment variables that will be used during the build process. This is helpful if you need to pass in secrets or other configuration to your build.
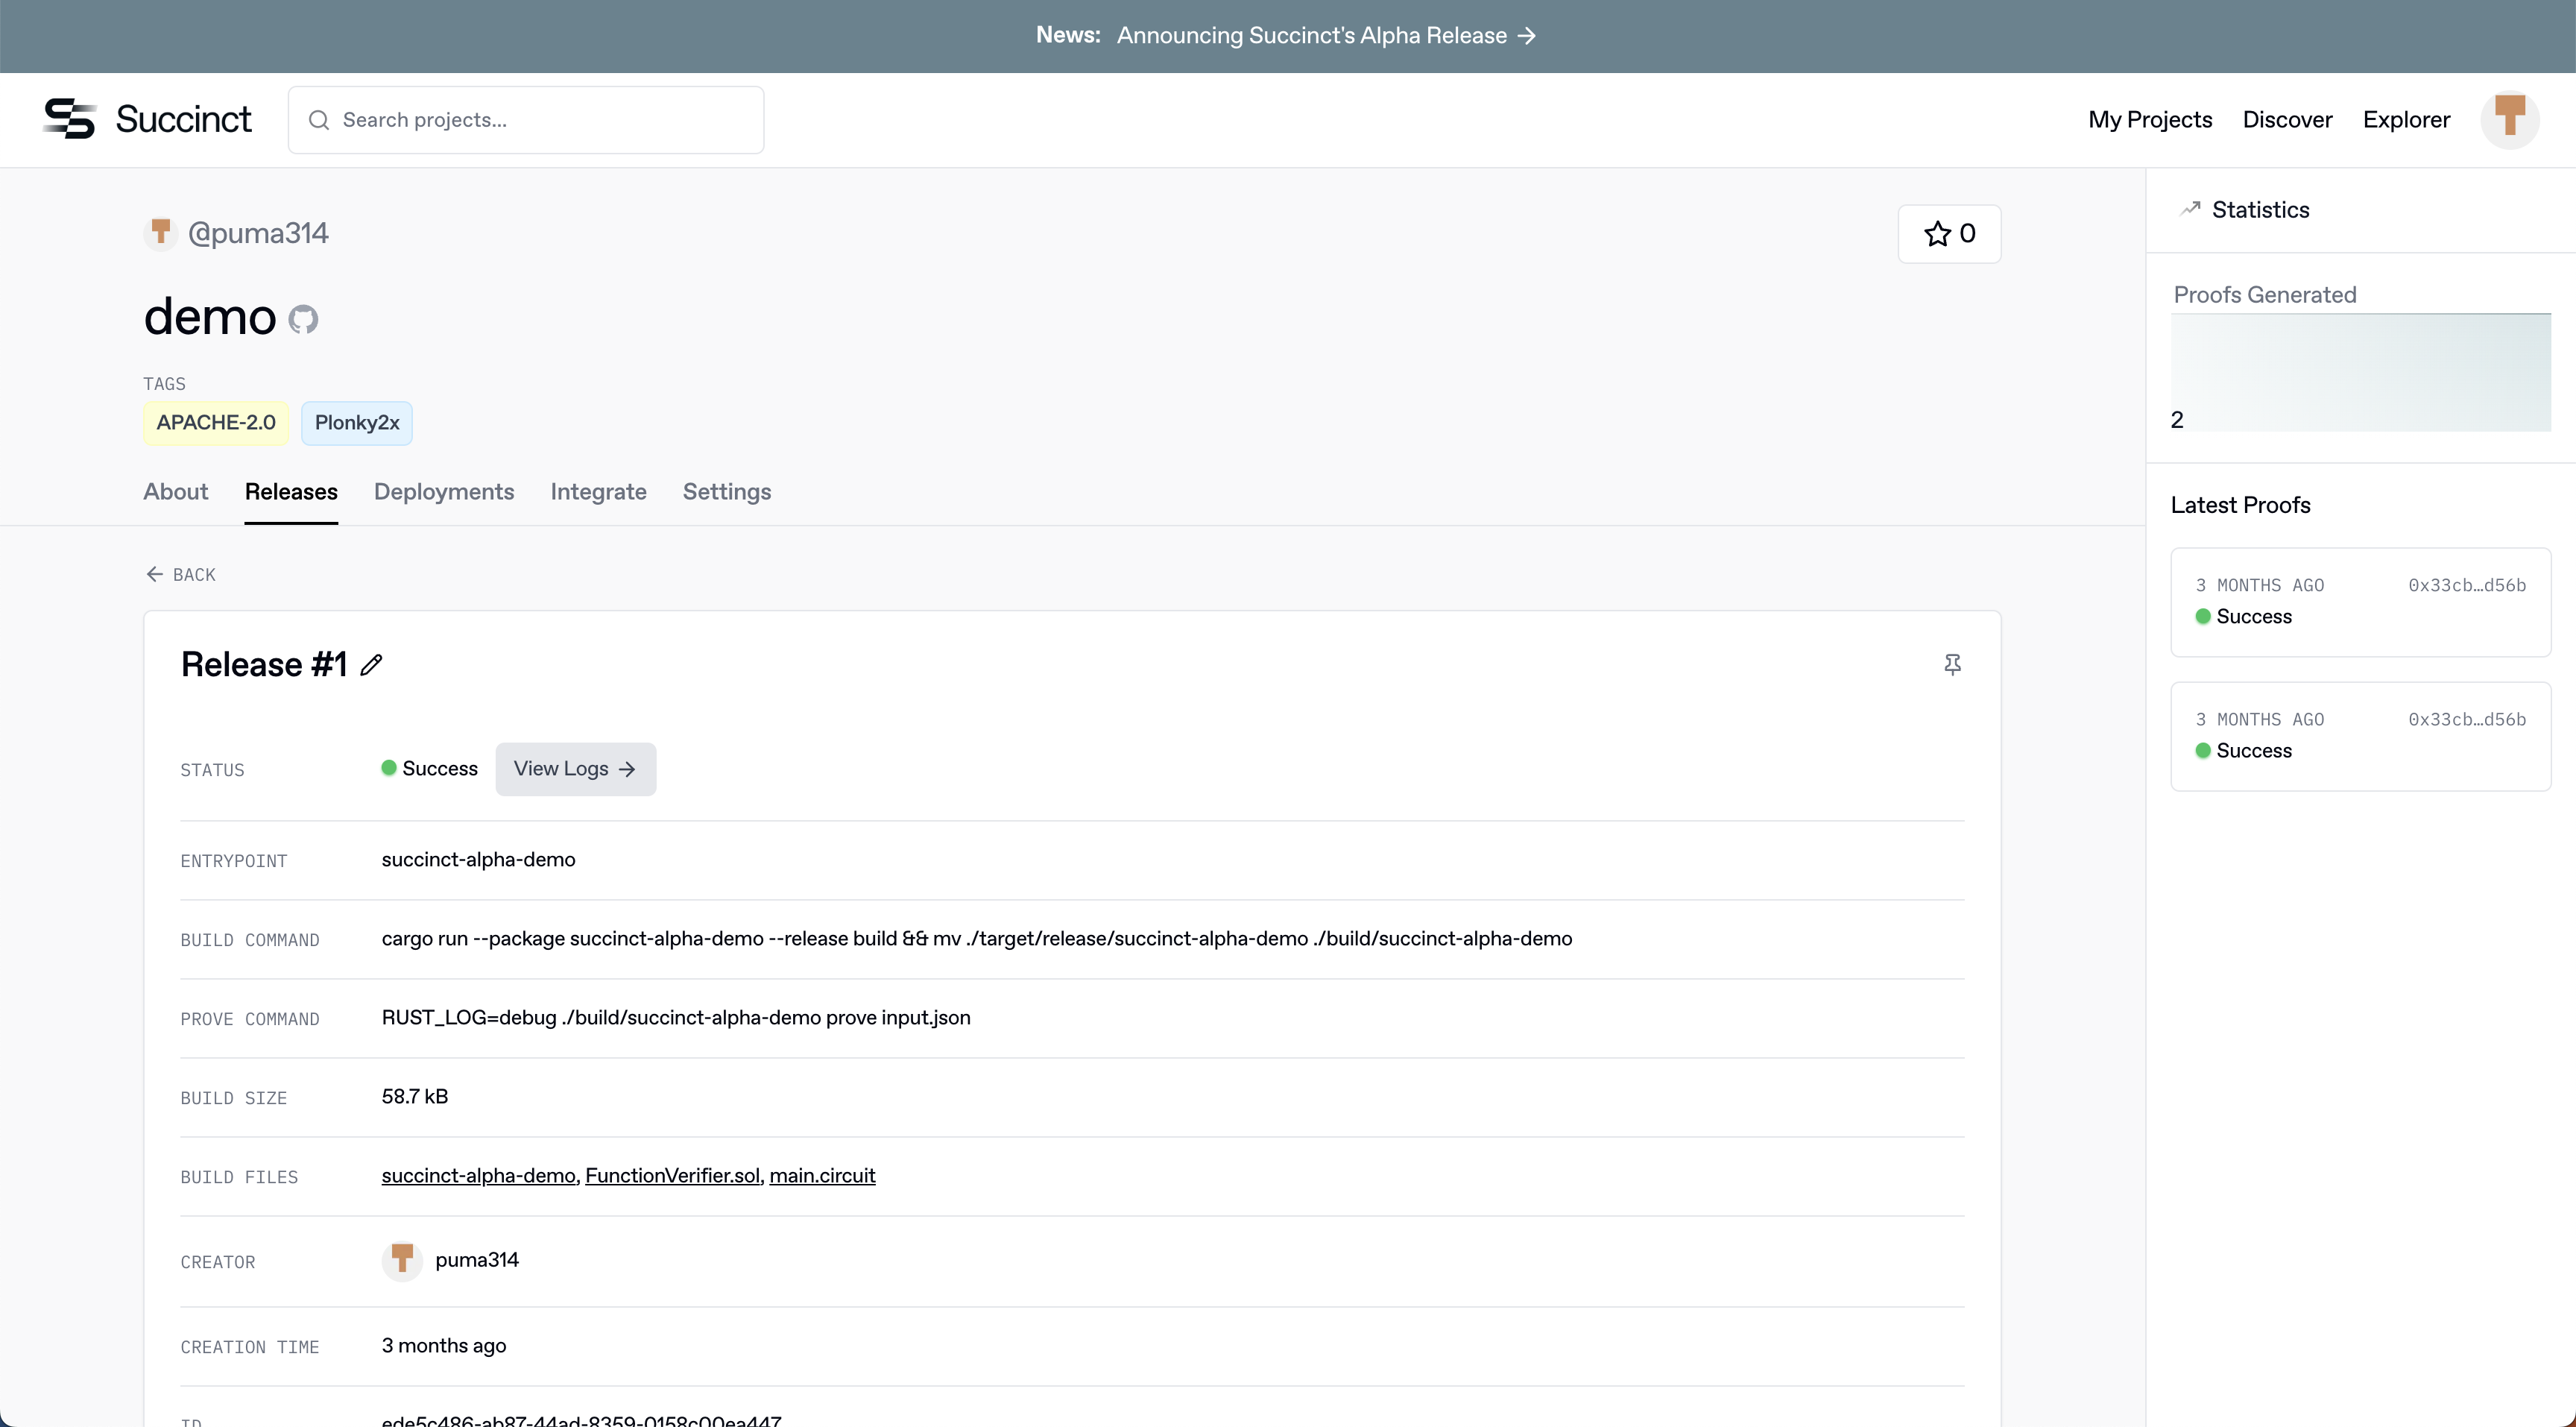
After creating the release, you can monitor the build status under the "releases" tab and view the logs to see the progress of the build.
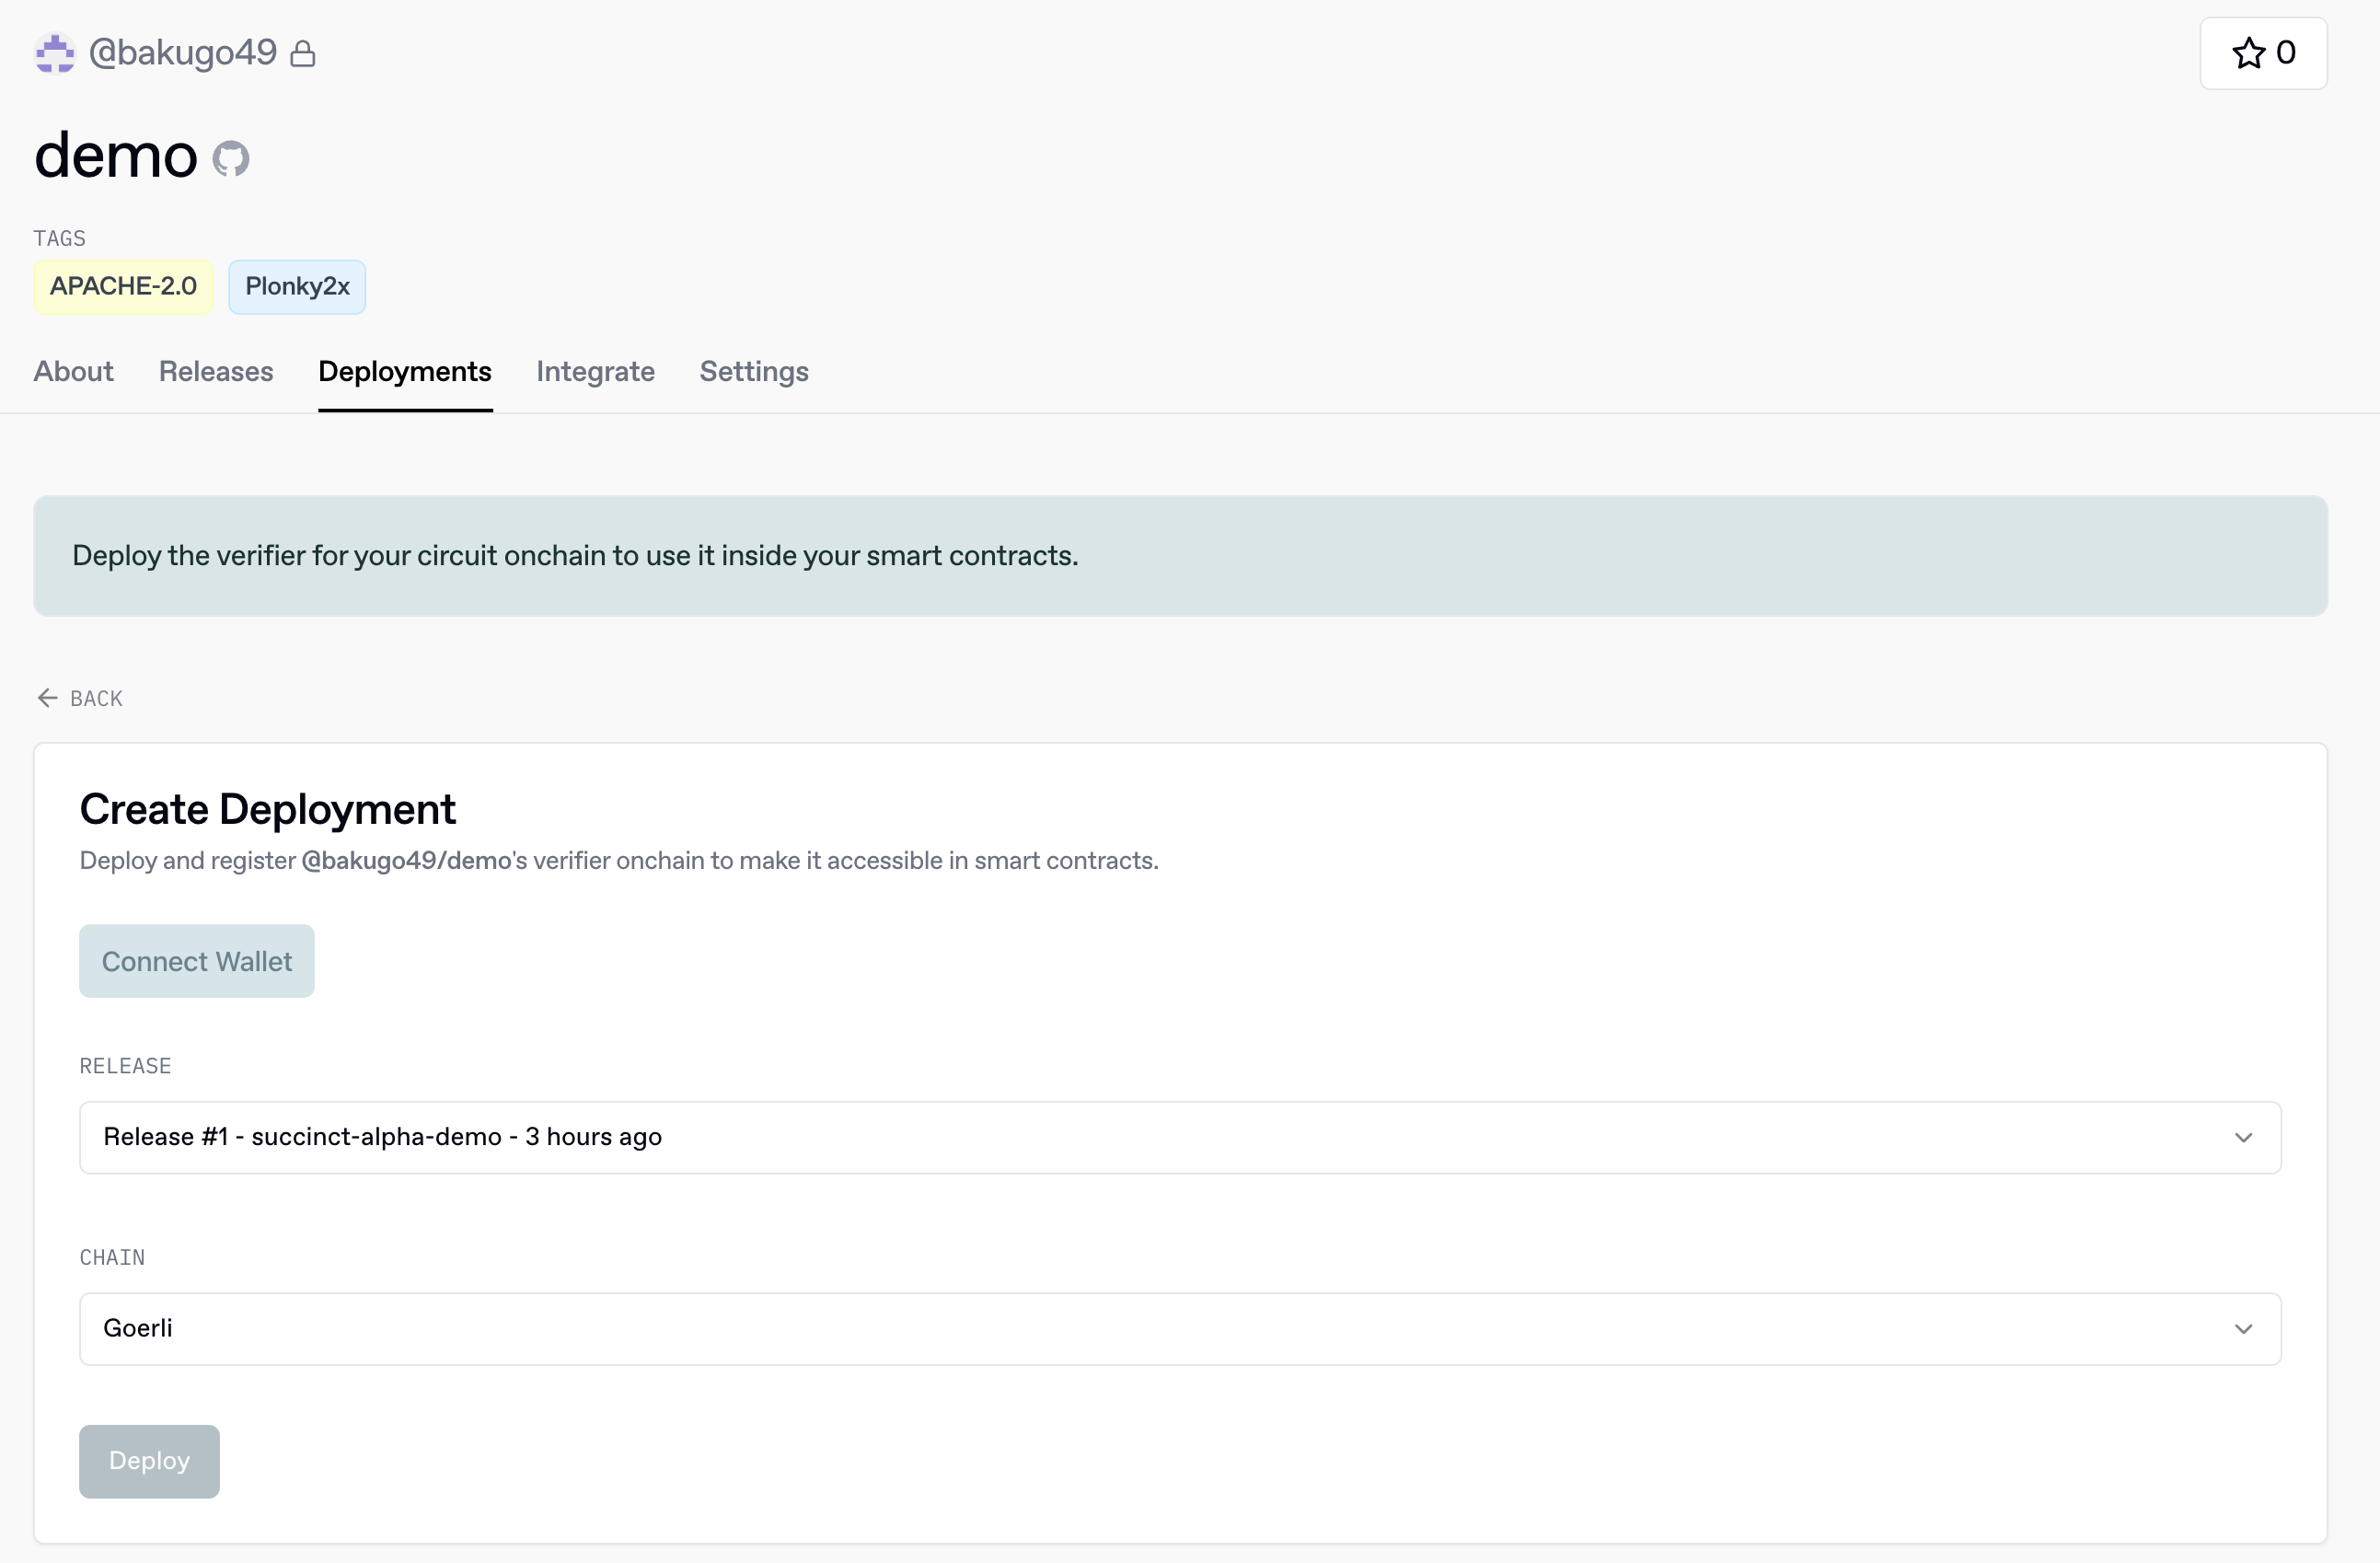
Deploy your verifier onchain
After creating a release, to use the proofs generated by your circuit onchain, you will need to deploy a verifier smart contract onchain. The verifier smart contract is generated as a "circuit artifact" during the release process.
To deploy your verifier, you will need to:
- Connect your wallet to pay for your deployment transaction.
- Select for which release you wish you deploy the verifier onchain.
- Select which network to deploy the verifier on.
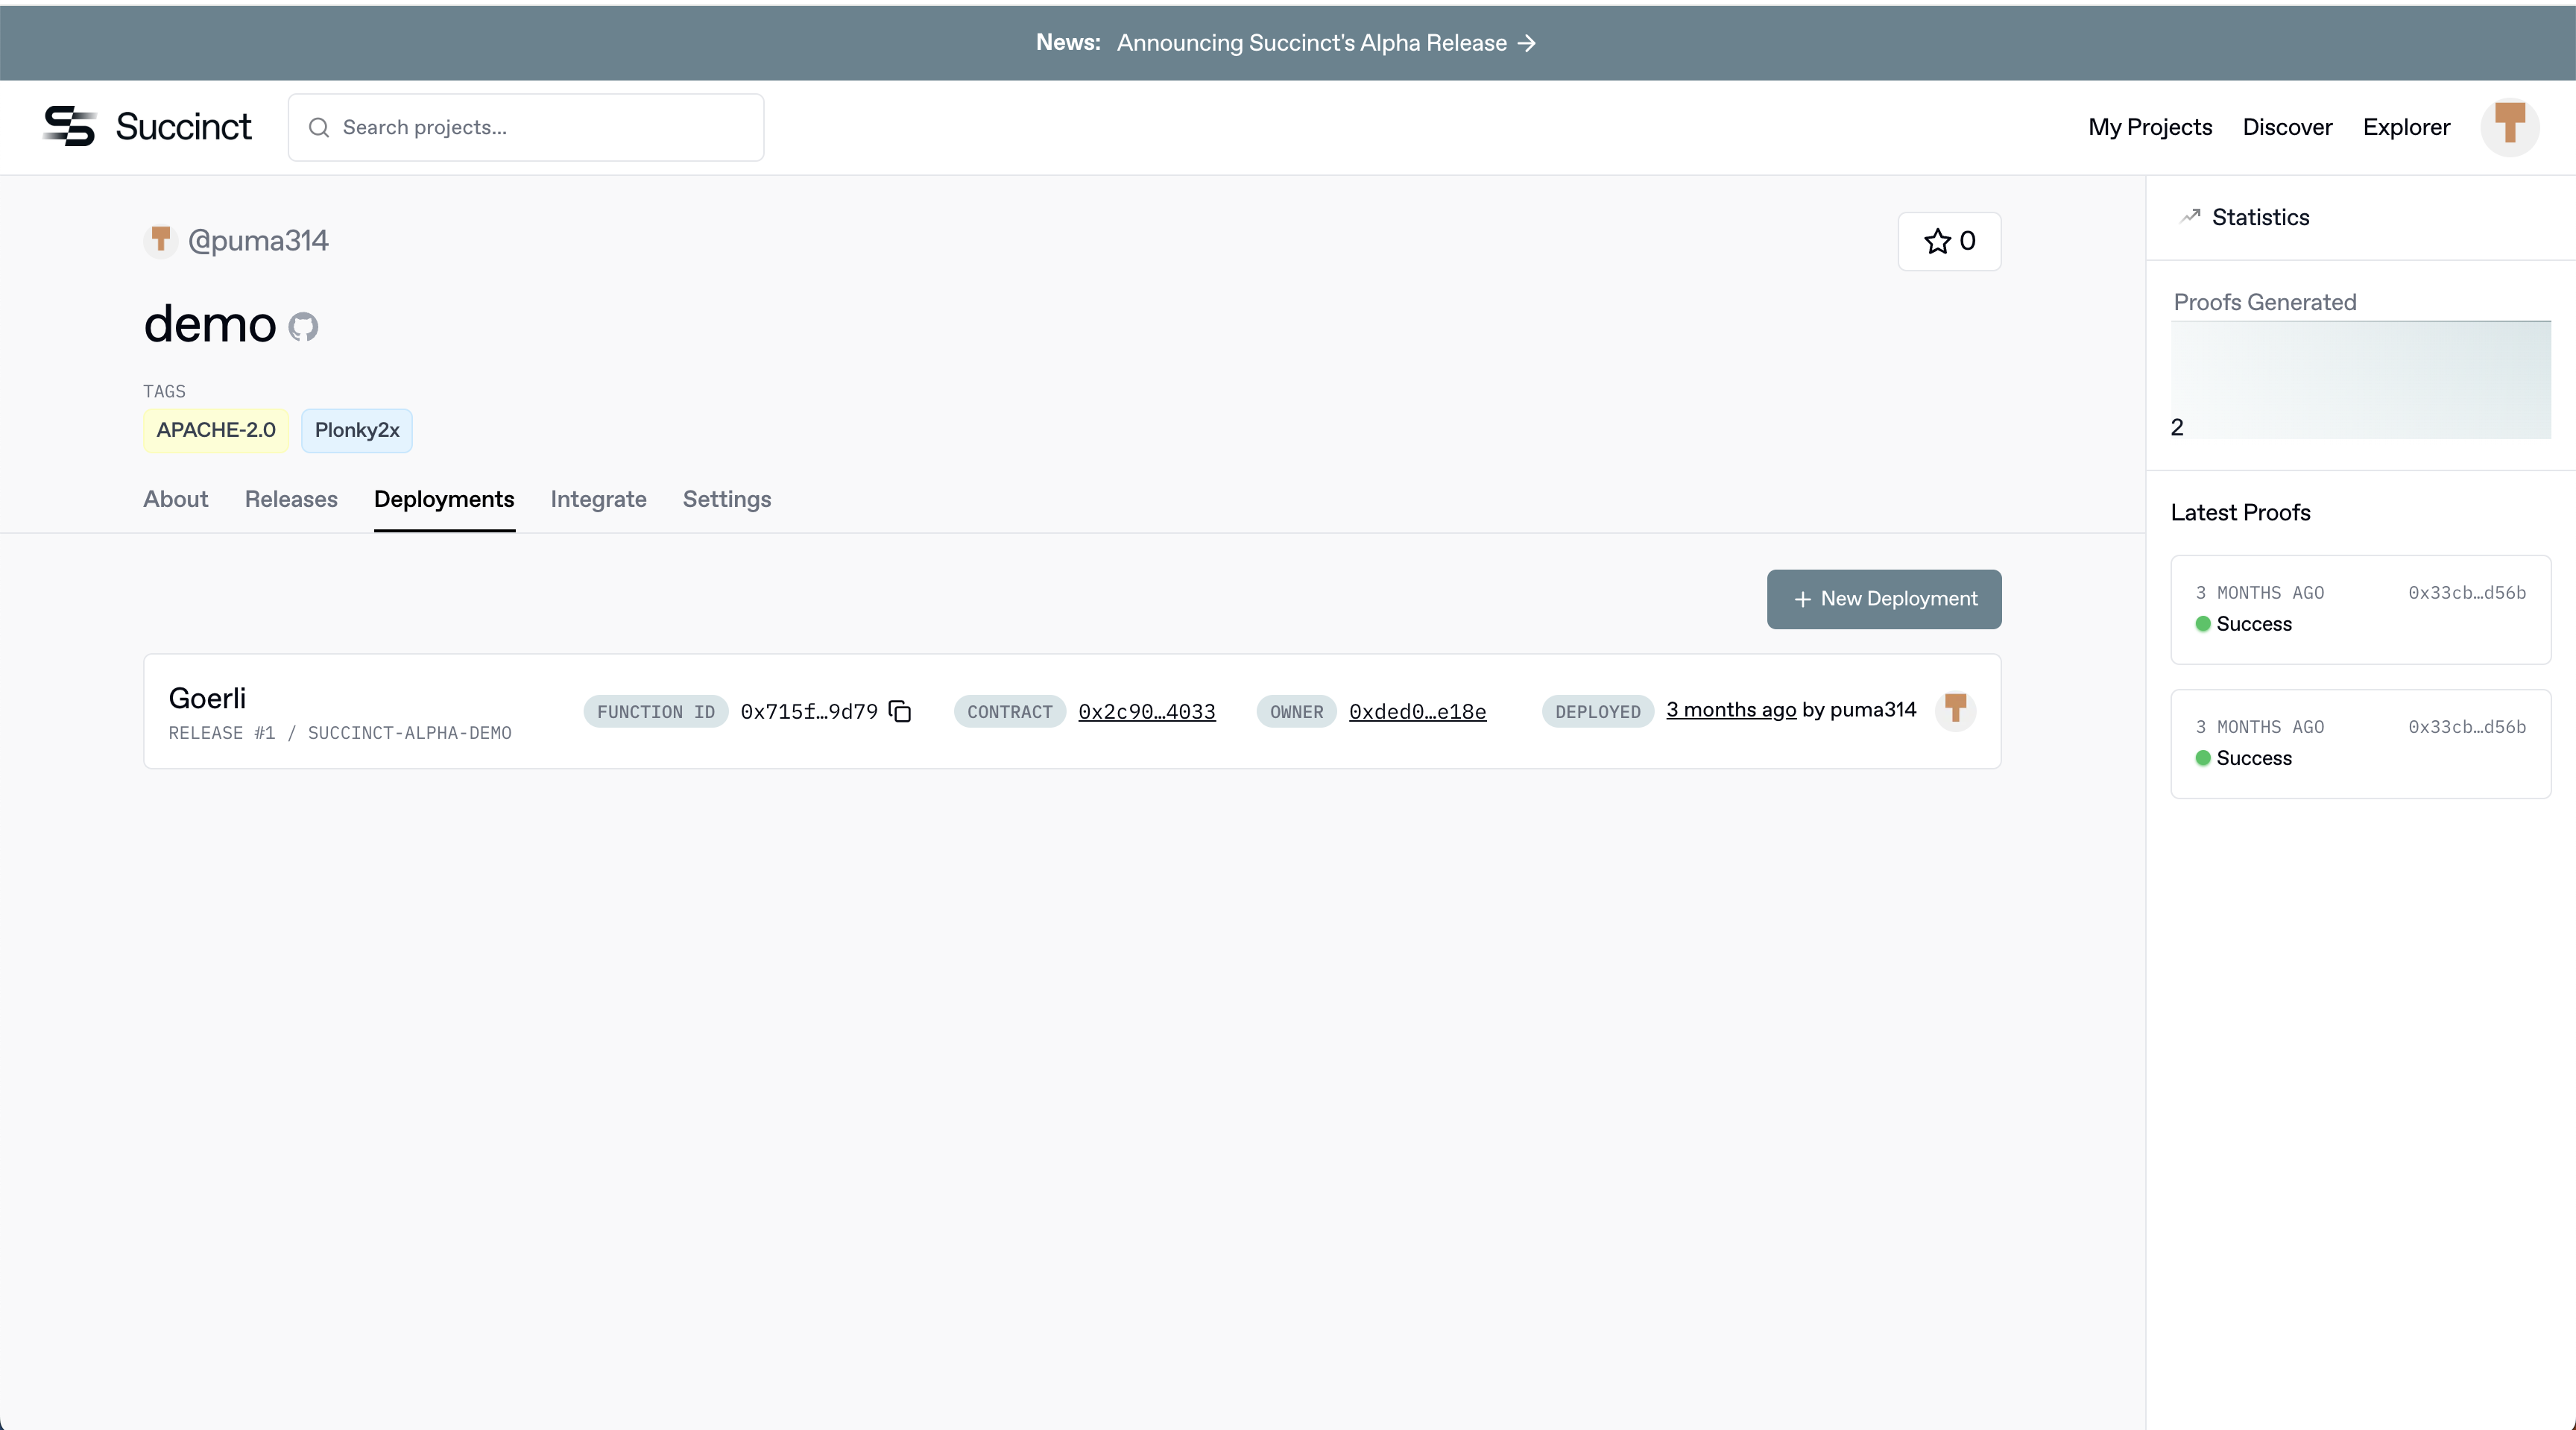
In the deployments tab, you can see all deployed verifiers and their chain, release name, and entrypoint (formatted as releaseName / entrypointName).
Verifier deployments have a contract address that is the address of the deployed verifier smart contract.
They also have a functionId that will be useful for making proof requests and onchain integration, which you can read more about in this section.