SP1
Documentation for SP1 users and developers.


SP1 is a performant, open-source zero-knowledge virtual machine (zkVM) that verifies the execution of arbitrary Rust (or any LLVM-compiled language) programs.
SP1 has undergone multiple audits from leading ZK security firms and is currently used in production by many top blockchain teams.
The future of ZK is writing normal code
Zero-knowledge proofs (ZKPs) are one of the most critical technologies to blockchain scaling, interoperability and privacy. But, historically building ZKP systems was extremely complicated--requiring large teams with specialized cryptography expertise and taking years to go to production.
SP1 provides a performant, general-purpose zkVM that enables any developer to use ZKPs by writing normal code (in Rust), and get cheap and fast proofs. SP1 will enable ZKPs to become mainstream, introducing a new era of verifiability for all of blockchain infrastructure and beyond.
SP1 enables a diversity of use-cases
ZKPs enable a diversity of use-cases in blockchain and beyond, including:
- Rollups: Use SP1 to generate a ZKP for the state transition function of your rollup and connect to Ethereum, Bitcoin or other chains with full validity proofs or ZK fraud proofs.
- Interoperability: Use SP1 for fast-finality, cross rollup interoperability
- Bridges: Use SP1 to generate a ZKP for verifying consensus of L1s, including Tendermint, Ethereum’s Light Client protocol and more, for bridging between chains.
- Oracles: Use SP1 for large scale computations with onchain state, including consensus data and storage data.
- Aggregation: Use SP1 to aggregate and verify other ZKPs for reduced onchain verification costs.
- Privacy: Use SP1 for onchain privacy, including private transactions and private state.
Why use SP1?
Use-Cases
Zero-knowledge proofs (ZKPs) are a powerful primitive that enable verifiable computation. With ZKPs, anyone can verify a cryptographic proof that a program has executed correctly, without needing to trust the prover, re-execute the program or even know the inputs to the program.
Historically, building ZKP systems has been extremely complicated, requiring large teams with specialized cryptography expertise and taking years to go to production. SP1 is a performant, general-purpose zkVM that solves this problem and creates a future where all blockchain infrastructure, including rollups, bridges, coprocessors, and more, utilize ZKPs via maintainable software written in Rust.
SP1 is especially powerful in blockchain contexts which rely on verifiable computation. Example applications include:
- Rollups: SP1 can be used in combination with existing node infrastructure like Reth to build rollups with ZKP validity proofs or ZK fraud proofs.
- Coprocessors: SP1 can be used to outsource onchain computation to offchain provers to enable use cases such as large-scale computation over historical state and onchain machine learning, dramatically reducing gas costs.
- Light Clients: SP1 can be used to build light clients that can verify the state of other chains, facilitating interoperability between different blockchains without relying on any trusted third parties.
SP1 has already been integrated in many of these applications, including but not limited to:
- SP1 Tendermint: An example of a ZK Tendermint light client on Ethereum powered by SP1.
- SP1 Reth: A performant, type-1 zkEVM written in Rust & SP1 using Reth.
- SP1 Contract Call: A lightweight library to generate ZKPs of Ethereum smart contract execution
- and many more!
SP1 is used by protocols in production today:
- SP1 Blobstream: A bridge that verifies Celestia “data roots” (a commitment to all data blobs posted in a range of Celestia blocks) on Ethereum and other EVM chains.
- SP1 Vector: A bridge that relays Avail's merkle root to Ethereum and also functions as a token bridge from Avail to Ethereum.
100x developer productivity
SP1 enables teams to use ZKPs in production with minimal overhead and fast timelines.
Maintainable: With SP1, you can reuse existing Rust crates, like revm, reth, tendermint-rs, serde and more, to write your ZKP logic in maintainable, Rust code.
Go to market faster: By reusing existing crates and expressing ZKP logic in regular code, SP1 significantly reduces audit surface area and complexity, enabling teams to go to market with ZKPs faster.
Blazing Fast Performance
SP1 is the fastest zkVM and has blazing fast performance on a variety of realistic blockchain workloads, including light clients and rollups. With SP1, ZKP proving costs are an order of magnitude less than alternative zkVMs or even circuits, making it cost-effective and fast for practical use.
Read more about our benchmarking results here.
Open Source
SP1 is 100% open-source (MIT / Apache 2.0) with no code obfuscation and built to be contributor friendly, with all development done in the open. Unlike existing zkVMs whose constraint logic is closed-source and impossible to audit or modify, SP1 is modularly architected and designed to be customizable from day one. This customizability (unique to SP1) allows for users to add “precompiles” to the core zkVM logic that yield substantial performance gains, making SP1’s performance not only SOTA vs. existing zkVMs, but also competitive with circuits in a variety of use-cases.
What is a zkVM?
A zero-knowledge virtual machine (zkVM) is zero-knowledge proof system that allows developers to prove the execution of arbitrary Rust (or other LLVM-compiled language) programs.
Conceptually, you can think of the SP1 zkVM as proving the evaluation of a function f(x) = y by following the steps below:
- Define
fusing normal Rust code and compile it to an ELF (covered in the writing programs section). - Setup a proving key (
pk) and verifying key (vk) for the program given the ELF. - Generate a proof
πusing the SP1 zkVM thatf(x) = ywithprove(pk, x). - Verify the proof
πusingverify(vk, x, y, π).
As a practical example, f could be a simple Fibonacci program. The process of generating a proof and verifying it can be seen here.
For blockchain applications, the verification usually happens inside of a smart contract.
How does SP1 Work?
At a high level, SP1 works with the following steps:
- Write a program in Rust that defines the logic of your computation for which you want to generate a ZKP.
- Compile the program to the RISC-V ISA (a standard Rust compilation target) using the
cargo proveCLI tool (installation instructions here) and generate a RISC-V ELF file. - SP1 will prove the correct execution of arbitrary RISC-V programs by generating a STARK proof of execution.
- Developers can leverage the
sp1-sdkcrate to generate proofs with their ELF and input data. Under the hood thesp1-sdkwill either generate proofs locally or use a beta version of Succinct's prover network to generate proofs.
SP1 leverages performant STARK recursion that allows us to prove the execution of arbitrarily long programs and also has a STARK -> SNARK "wrapping system" that allows us to generate small SNARK proofs that can be efficiently verified on EVM chains.
Proof System
For more technical details, check out the SP1 technical note that explains our proof system in detail. In short, we use:
- STARKs + FRI over the Baby Bear field
- We use performant STARK recursion that allows us to prove the execution of arbitrarily long programs
- We have a system of performant precompiles that accelerate hash functions and cryptographic signature verification that allow us to get substantial performance gains on blockchain workloads
Installation
SP1 currently runs on Linux and macOS. You can either use prebuilt binaries through sp1up or build the Succinct Rust toolchain and CLI from source.
Requirements
Option 1: Prebuilt Binaries (Recommended)
sp1up is the SP1 toolchain installer. Open your terminal and run the following command and follow the instructions:
curl -L https://sp1.succinct.xyz | bash
Then simply follow the instructions on-screen, which will make the sp1up command available in your CLI.
After following the instructions, you can run sp1up to install the toolchain and the cargo prove CLI:
sp1up
This will install two things:
- The
succinctRust toolchain which has support for theriscv32im-succinct-zkvm-elfcompilation target. cargo proveCLI tool that provides convenient commands for compiling SP1 programs and other helper functionality.
You can verify the installation of the CLI by running cargo prove --version:
cargo prove --version
You can check the version of the Succinct Rust toolchain by running:
RUSTUP_TOOLCHAIN=succinct cargo --version
or equivalently:
cargo +succinct --version
If this works, go to the next section to compile and prove a simple zkVM program.
Troubleshooting
Rate-limiting
If you experience rate-limiting when using the sp1up command, you can resolve this by using the --token flag and providing your GitHub token. To create a Github token, follow the instructions here.
Unsupported OS Architectures
Currently our prebuilt binaries are built on Ubuntu 20.04 (22.04 on ARM) and macOS. If your OS uses an older GLIBC version, it's possible these may not work and you will need to build the toolchain from source.
Conflicting cargo-prove installations
If you have installed cargo-prove from source, it may conflict with sp1up's cargo-prove installation or vice versa. You can remove the cargo-prove that was installed from source with the following command:
rm ~/.cargo/bin/cargo-prove
Or, you can remove the cargo-prove that was installed through sp1up:
rm ~/.sp1/bin/cargo-prove
Option 2: Building from Source
Make sure you have installed the dependencies needed to build the rust toolchain from source.
Clone the sp1 repository and navigate to the root directory.
git clone git@github.com:succinctlabs/sp1.git
cd sp1
cd crates
cd cli
cargo install --locked --path .
cd ~
cargo prove build-toolchain
Building the toolchain can take a while, ranging from 30 mins to an hour depending on your machine. If you're on a machine that we have prebuilt binaries for (ARM Mac or x86 or ARM Linux), you can use the following to download a prebuilt version.
cargo prove install-toolchain
To verify the installation of the toolchain, run and make sure you see succinct:
rustup toolchain list
You can delete your existing installation of the toolchain with:
rustup toolchain remove succinct
Quickstart
In this section, we will show you how to create a simple Fibonacci program using the SP1 zkVM.
Create an SP1 Project
Option 1: Cargo Prove New CLI (Recommended)
You can use the cargo prove CLI to create a new project using the cargo prove new <--bare|--evm> <name> command. The --bare option sets up a basic SP1 project for standalone zkVM programs, while --evm adds additional components including Solidity contracts for on-chain proof verification.
This command will create a new folder in your current directory which includes solidity smart contracts for onchain integration.
cargo prove new --evm fibonacci
cd fibonacci
Option 2: Project Template (Solidity Contracts for Onchain Verification)
If you want to use SP1 to generate proofs that will eventually be verified on an EVM chain, you should use the SP1 project template. This Github template is scaffolded with a SP1 program, a script to generate proofs, and also a contracts folder that contains a Solidity contract that can verify SP1 proofs on any EVM chain.
Either fork the project template repository or clone it:
git clone https://github.com/succinctlabs/sp1-project-template.git
Project Overview
Your new project will have the following structure (ignoring the contracts folder, if you are using the project template):
.
├── program
│   ├── Cargo.lock
│   ├── Cargo.toml
│   └── src
│       └── main.rs
├── rust-toolchain
└── script
    ├── Cargo.lock
    ├── Cargo.toml
    ├── build.rs
    └── src
        └── bin
            ├── prove.rs
            └── vkey.rs

6 directories, 4 files
There are 2 directories (each a crate) in the project:
program: the source code that will be proven inside the zkVM.script: code that contains proof generation and verification code.
We recommend you install the rust-analyzer extension.
Note that if you use cargo prove new inside a monorepo, you will need to add the manifest file to rust-analyzer.linkedProjects to get full IDE support.
Build
Before we can run the program inside the zkVM, it must be compiled to a RISC-V executable using the succinct Rust toolchain. This is called an ELF (Executable and Linkable Format). To compile the program, you can run the following command:
cd program && cargo prove build
which will generate an ELF file under target/elf-compilation.
Note: the build.rs file in the script directory will use run the above command automatically to build the ELF, meaning you don't have to manually run cargo prove build every time you make a change to the program!
Execute
To test your program, you can first execute your program without generating a proof. In general this is helpful for iterating on your program and verifying that it is correct.
cd ../script
RUST_LOG=info cargo run --release -- --execute
Prove
When you are ready to generate a proof, you should run the script with the --prove flag that will generate a proof.
cd ../script
RUST_LOG=info cargo run --release -- --prove
The output should show something like this:
n: 20
2024-07-23T17:07:07.874856Z  INFO prove_core:collect_checkpoints: clk = 0 pc = 0x2017e8
2024-07-23T17:07:07.876264Z  INFO prove_core:collect_checkpoints: close time.busy=2.00ms time.idle=1.50µs
2024-07-23T17:07:07.913304Z  INFO prove_core:shard: close time.busy=32.2ms time.idle=791ns
2024-07-23T17:07:10.724280Z  INFO prove_core:commit: close time.busy=2.81s time.idle=1.25µs
2024-07-23T17:07:10.725923Z  INFO prove_core:prove_checkpoint: clk = 0 pc = 0x2017e8     num=0
2024-07-23T17:07:10.729130Z  INFO prove_core:prove_checkpoint: close time.busy=3.68ms time.idle=1.17µs num=0
2024-07-23T17:07:14.648146Z  INFO prove_core: execution report (totals): total_cycles=9329, total_syscall_cycles=20
2024-07-23T17:07:14.648180Z  INFO prove_core: execution report (opcode counts):
2024-07-23T17:07:14.648197Z  INFO prove_core:   1948 add
...
2024-07-23T17:07:14.648277Z  INFO prove_core: execution report (syscall counts):
2024-07-23T17:07:14.648408Z  INFO prove_core:   8 commit
...
2024-07-23T17:07:14.648858Z  INFO prove_core: summary: cycles=9329, e2e=9.193968459, khz=1014.69, proofSize=1419780
2024-07-23T17:07:14.653193Z  INFO prove_core: close time.busy=9.20s time.idle=12.2µs
Successfully generated proof!
fib(n): 10946
The program by default is quite small, so proof generation will only take a few seconds locally. After it generates, the proof will be verified for correctness.
Note: When benchmarking proof generation times locally, it is important to note that there is a fixed overhead for proving, which means that the proof generation time for programs with a small number of cycles is not representative of the performance of larger programs (which often have better performance characteristics as the overhead is amortized across many cycles).
Recommended Workflow
Please see the Recommended Workflow section for more details on how to develop your SP1 program and generate proofs.
We strongly recommend that developers who want to use SP1 for non-trivial programs generate proofs on the beta version of our Prover Network. The prover network generates SP1 proofs across multiple machines, reducing latency and also runs SP1 on optimized hardware instances that result in faster + cheaper proof generation times.
We recommend that for any production benchmarking, you use the prover network to estimate latency and costs of proof generation. We also would love to chat with your team directly to help you get started with the prover network--please fill out this form.
Project Template
Another option for getting started with SP1 is to use the SP1 Project Template.
You can use this as a Github template to create a new repository that has a SP1 program, a script to generate proofs, and also a contracts folder that contains a Solidity contract that can verify SP1 proofs on any EVM chain.
Proof Generation Requirements
We recommend that for any production benchmarking, you use the prover network to estimate latency and costs of proof generation.
Local Proving
If you want to generate SP1 proofs locally, this section has an overview of the hardware requirements required. These requires depend on which types of proofs you want to generate and can also change over time as the design of the zKVM evolves.
The most important requirement is CPU for performance/latency and RAM to prevent running out of memory.
| Mock / Network | Core / Compress | Groth16 and PLONK (EVM) | |
|---|---|---|---|
| CPU | 1+, single-core perf matters | 16+, more is better | 16+, more is better |
| Memory | 8GB+, more is better | 16GB+, more if you have more cores | 16GB+, more is better |
| Disk | 10GB+ | 10GB+ | 10GB+ |
| EVM Compatible | ✅ | ❌ | ✅ |
CPU
The execution & trace generation of the zkVM is mostly CPU bound, having a high single-core performance is recommended to accelerate these steps. The rest of the prover is mostly bound by hashing/field operations which can be parallelized with multiple cores.
Memory
Our prover requires keeping large matrices (i.e., traces) in memory to generate the proofs. Certain steps of the prover have a minimum memory requirement, meaning that if you have less than this amount of memory, the process will OOM.
This effect is most noticeable when using the Groth16 or PLONK provers. If you're running the Groth16 or Plonk provers locally on Mac or Windows using docker, you might need to increase the memory limit for docker desktop.
Disk
Disk is required to install the SP1 zkVM toolchain and to install the circuit artifacts, if you plan to locally build the Groth16 or PLONK provers.
Furthermore, disk is used to checkpoint the state of the program execution, which is required to generate the proofs.
Writing Programs: Setup
In this section, we will teach you how to setup a self-contained crate which can be compiled as a program that can be executed inside the zkVM.
Create Project with CLI (Recommended)
The recommended way to setup your first program to prove inside the zkVM is using the method described in Quickstart which will create a program folder.
cargo prove new <name>
cd program
Manual Project Setup
You can also manually setup a project. First create a new Rust project using cargo:
cargo new program
cd program
Cargo Manifest
Inside this crate, add the sp1-zkvm crate as a dependency. Your Cargo.toml should look like the following:
[workspace]
[package]
version = "0.1.0"
name = "program"
edition = "2021"

[dependencies]
sp1-zkvm = "3.0.0"
The sp1-zkvm crate includes necessary utilities for your program, including handling inputs and outputs,
precompiles, patches, and more.
main.rs
Inside the src/main.rs file, you must make sure to include these two lines to ensure that your program properly compiles to a valid SP1 program.
#![no_main]
sp1_zkvm::entrypoint!(main);
These two lines of code wrap your main function with some additional logic to ensure that your program compiles correctly with the RISC-V target.
Writing Programs: Basics
The easiest way to understand how to write programs for the SP1 zkVM is to look at some examples.
Example: Fibonacci
This program is from the examples directory in the SP1 repo which contains several example programs of varying complexity.
//! A simple program that takes a number `n` as input, and writes the `n-1`th and `n`th fibonacci
//! number as an output.

// These two lines are necessary for the program to properly compile.
//
// Under the hood, we wrap your main function with some extra code so that it behaves properly
// inside the zkVM.
#![no_main]
sp1_zkvm::entrypoint!(main);

pub fn main() {
    // Read an input to the program.
    //
    // Behind the scenes, this compiles down to a system call which handles reading inputs
    // from the prover.
    let n = sp1_zkvm::io::read::<u32>();

    // Write n to public input
    sp1_zkvm::io::commit(&n);

    // Compute the n'th fibonacci number, using normal Rust code.
    let mut a = 0;
    let mut b = 1;
    for _ in 0..n {
        let mut c = a + b;
        c %= 7919; // Modulus to prevent overflow.
        a = b;
        b = c;
    }

    // Write the output of the program.
    //
    // Behind the scenes, this also compiles down to a system call which handles writing
    // outputs to the prover.
    sp1_zkvm::io::commit(&a);
    sp1_zkvm::io::commit(&b);
}
As you can see, writing programs is as simple as writing normal Rust.
After you've written your program, you must compile it to an ELF that the SP1 zkVM can prove. To read more about compiling programs, refer to the section on Compiling Programs. To read more about how inputs and outputs work, refer to the section on Inputs & Outputs.
Compiling Programs
Once you have written an SP1 program, you must compile it to an ELF file that can be executed in the zkVM. The cargo prove CLI tool (downloaded during installation) provides convenient commands for compiling SP1 programs.
Development Builds
WARNING: This may not generate a reproducible ELF which is necessary for verifying that your binary corresponds to given source code.
Use the reproducible build system for production builds.
To build a program while developing, simply run the following command in the crate that contains your SP1 program:
cargo prove build
This will compile the ELF that can be executed in the zkVM. The output from the command will look something like this:
[sp1]     Compiling version_check v0.9.4
[sp1]     Compiling proc-macro2 v1.0.86
[sp1]     Compiling unicode-ident v1.0.12
[sp1]     Compiling cfg-if v1.0.0
...
[sp1]     Compiling sp1-lib v1.0.1
[sp1]     Compiling sp1-zkvm v1.0.1
[sp1]     Compiling fibonacci-program v0.1.0 (/Users/username/Documents/fibonacci/program)
[sp1]      Finished `release` profile [optimized] target(s) in 8.33s
Under the hood, this CLI command calls cargo build with the riscv32im-succinct-zkvm-elf target and other required environment variables and flags. The logic for this command is defined in the sp1-build crate.
Advanced Build Options
You can pass additional arguments to the cargo prove build command to customize the build process, like configuring what features are enabled, customizing the output directory and more. To see all available options, run cargo prove build --help. Many of these options mirror the options available in the cargo build command.
Production Builds
For production builds of programs, you can build your program inside a Docker container which will generate a reproducible ELF on all platforms. To do so, just use the --docker flag and optionally the --tag flag with the release version you want to use (defaults to latest). For example:
cargo prove build --docker --tag v1.0.1
To verify that your build is reproducible, you can compute the SHA-512 hash of the ELF on different platforms and systems with:
$ shasum -a 512 elf/riscv32im-succinct-zkvm-elf
f9afb8caaef10de9a8aad484c4dd3bfa54ba7218f3fc245a20e8a03ed40b38c617e175328515968aecbd3c38c47b2ca034a99e6dbc928512894f20105b03a203
Build Script
If you want your program crate to be built automatically whenever you build/run your script crate, you can add a build.rs file inside of script/ (at the same level as Cargo.toml of your script crate) that utilizes the sp1-build crate:
fn main() {
    sp1_build::build_program("../program");
}
The path passed in to build_program should point to the directory containing the Cargo.toml file for your program. Make sure to also add sp1-build as a build dependency in script/Cargo.toml:
[build-dependencies]
sp1-build = "3.0.0"
You will see output like the following from the build script if the program has changed, indicating that the program was rebuilt:
[fibonacci-script 0.1.0] cargo:rerun-if-changed=../program/src
[fibonacci-script 0.1.0] cargo:rerun-if-changed=../program/Cargo.toml
[fibonacci-script 0.1.0] cargo:rerun-if-changed=../program/Cargo.lock
[fibonacci-script 0.1.0] cargo:warning=fibonacci-program built at 2024-03-02 22:01:26
[fibonacci-script 0.1.0] [sp1]    Compiling fibonacci-program v0.1.0 (/Users/umaroy/Documents/fibonacci/program)
[fibonacci-script 0.1.0] [sp1]     Finished release [optimized] target(s) in 0.15s
warning: fibonacci-script@0.1.0: fibonacci-program built at 2024-03-02 22:01:26
The above output was generated by running RUST_LOG=info cargo run --release -vv for the script folder of the Fibonacci example.
Advanced Build Options
To configure the build process when using the sp1-build crate, you can pass a BuildArgs struct to to the build_program_with_args function. The build arguments are the same as the ones available from the cargo prove build command.
As an example, you could use the following code to build the Fibonacci example with the docker flag set to true and a custom output directory for the generated ELF:
use sp1_build::{build_program_with_args, BuildArgs};

fn main() {
    let args = BuildArgs {
        docker: true,
        output_directory: "./fibonacci-program".to_string(),
        ..Default::default()
    };
    build_program_with_args("../program", &args);
}
Note: If you want reproducible builds with the build.rs approach, you should use the docker flag and the build_program_with_args function, as shown in the example above.
Inputs and Outputs
In real world applications of zero-knowledge proofs, you almost always want to verify your proof in the context of some inputs and outputs. For example:
- Rollups: Given a list of transactions, prove the new state of the blockchain.
- Coprocessors: Given a block header, prove the historical state of some storage slot inside a smart contract.
- Attested Images: Given a signed image, prove that you made a restricted set of image transformations.
In this section, we cover how you pass inputs and outputs to the zkVM and create new types that support serialization.
Reading Data
Data that is read is not public to the verifier by default. Use the sp1_zkvm::io::read::<T> method:
let a = sp1_zkvm::io::read::<u32>();
let b = sp1_zkvm::io::read::<u64>();
let c = sp1_zkvm::io::read::<String>();
Note that T must implement the serde::Serialize and serde::Deserialize trait. If you want to read bytes directly, you can also use the sp1_zkvm::io::read_vec method.
let my_vec = sp1_zkvm::io::read_vec();
Committing Data
Committing to data makes the data public to the verifier. Use the sp1_zkvm::io::commit::<T> method:
sp1_zkvm::io::commit::<u32>(&a);
sp1_zkvm::io::commit::<u64>(&b);
sp1_zkvm::io::commit::<String>(&c);
Note that T must implement the Serialize and Deserialize trait. If you want to write bytes directly, you can also use sp1_zkvm::io::commit_slice method:
let mut my_slice = [0_u8; 32];
sp1_zkvm::io::commit_slice(&my_slice);
Creating Serializable Types
Typically, you can implement the Serialize and Deserialize traits using a simple derive macro on a struct.
use serde::{Serialize, Deserialize};

#[derive(Serialize, Deserialize)]
struct MyStruct {
    a: u32,
    b: u64,
    c: String
}
For more complex usecases, refer to the Serde docs.
Example
Here is a basic example of using inputs and outputs with more complex types.
#![no_main]
sp1_zkvm::entrypoint!(main);

use serde::{Deserialize, Serialize};

#[derive(Serialize, Deserialize, Debug, PartialEq)]
struct MyPointUnaligned {
    pub x: usize,
    pub y: usize,
    pub b: bool,
}

pub fn main() {
    let p1 = sp1_zkvm::io::read::<MyPointUnaligned>();
    println!("Read point: {:?}", p1);

    let p2 = sp1_zkvm::io::read::<MyPointUnaligned>();
    println!("Read point: {:?}", p2);

    let p3: MyPointUnaligned = MyPointUnaligned { x: p1.x + p2.x, y: p1.y + p2.y, b: p1.b && p2.b };
    println!("Addition of 2 points: {:?}", p3);
    sp1_zkvm::io::commit(&p3);
}
Patched Crates
We maintain forks of commonly used libraries in blockchain infrastructure to significantly accelerate the execution of certain operations. Under the hood, we use precompiles to achieve tremendous performance improvements in proof generation time.
If you know of a library or library version that you think should be patched, please open an issue or a pull request!
Supported Libraries
| Crate Name | Repository | Notes | Versions |
|---|---|---|---|
| sha2 | sp1-patches/RustCrypto-hashes | sha256 | 0.9.8, 0.10.6, 0.10.8 |
| sha3 | sp1-patches/RustCrypto-hashes | keccak256 | 0.9.8, 0.10.6, 0.10.8 |
| bigint | sp1-patches/RustCrypto-bigint | bigint | 0.5.5 |
| tiny-keccak | sp1-patches/tiny-keccak | keccak256 | 2.0.2 |
| curve25519-dalek | sp1-patches/curve25519-dalek | ed25519 verify | 4.1.3, 3.2.0 |
| curve25519-dalek-ng | sp1-patches/curve25519-dalek-ng | ed25519 verify | 4.1.1 |
| ed25519-consensus | sp1-patches/ed25519-consensus | ed25519 verify | 2.1.0 |
| ed25519-dalek | sp1-patches/ed25519-dalek | ed25519 verify | 1.0.1 |
| ecdsa-core | sp1-patches/signatures | secp256k1 verify | 0.16.8, 0.16.9 |
| secp256k1 | sp1-patches/rust-secp256k1 | secp256k1 verify | 0.29.0, 0.29.1 |
| substrate-bn | sp1-patches/bn | BN254 | 0.6.0 |
| bls12_381 | sp1-patches/bls12_381 | BLS12-381 | 0.8.0 |
Using Patched Crates
To use the patched libraries, you can use corresponding patch entries in your program's Cargo.toml such as:
[patch.crates-io]
sha2-v0-9-8 = { git = "https://github.com/sp1-patches/RustCrypto-hashes", package = "sha2", tag = "sha2-v0.9.8-patch-v1" }
sha2-v0-10-6 = { git = "https://github.com/sp1-patches/RustCrypto-hashes", package = "sha2", tag = "sha2-v0.10.6-patch-v1" }
sha2-v0-10-8 = { git = "https://github.com/sp1-patches/RustCrypto-hashes", package = "sha2", tag = "sha2-v0.10.8-patch-v1" }
sha3-v0-9-8 = { git = "https://github.com/sp1-patches/RustCrypto-hashes", package = "sha3", tag = "sha3-v0.9.8-patch-v1" }
sha3-v0-10-6 = { git = "https://github.com/sp1-patches/RustCrypto-hashes", package = "sha3", tag = "sha3-v0.10.6-patch-v1" }
sha3-v0-10-8 = { git = "https://github.com/sp1-patches/RustCrypto-hashes", package = "sha3", tag = "sha3-v0.10.8-patch-v1" }
crypto-bigint = { git = "https://github.com/sp1-patches/RustCrypto-bigint", tag = "crypto_bigint-v0.5.5-patch-v1" }
tiny-keccak = { git = "https://github.com/sp1-patches/tiny-keccak", tag = "tiny_keccak-v2.0.2-patch-v1" }
curve25519-dalek = { git = "https://github.com/sp1-patches/curve25519-dalek", tag = "curve25519_dalek-v4.1.3-patch-v1" }
curve25519-dalek-ng = { git = "https://github.com/sp1-patches/curve25519-dalek-ng", tag = "curve25519_dalek_ng-v4.1.1-patch-v1" }
ed25519-consensus = { git = "https://github.com/sp1-patches/ed25519-consensus", tag = "ed25519_consensus-v2.1.0-patch-v1" }
ecdsa-core = { git = "https://github.com/sp1-patches/signatures", package = "ecdsa", tag = "ecdsa-v0.16.9-patch-v1" }
secp256k1 = { git = "https://github.com/sp1-patches/rust-secp256k1", tag = "secp256k1-v0.29.0-patch-v1" }
substrate-bn = { git = "https://github.com/sp1-patches/bn", tag = "substrate_bn-v0.6.0-patch-v1" }
bls12_381 = { git = "https://github.com/sp1-patches/bls12_381", tag = "bls12_381-v0.8.0-patch-v1" }
If you are patching a crate from Github instead of from crates.io, you need to specify the repository in the patch section. For example:
[patch."https://github.com/RustCrypto/hashes"]
sha3 = { git = "https://github.com/sp1-patches/RustCrypto-hashes", package = "sha3", tag = "sha3-v0.10.8-patch-v1"  }
An example of using patched crates is available in our Tendermint Example.
Ed25519 Acceleration
To accelerate Ed25519 operations, you'll need to patch crates depending on if you're using the ed25519-consensus or ed25519-dalek library in your program or dependencies.
Generally, ed25519-consensus has better performance than ed25519-dalek by a factor of 2.
Patches
Apply the following patches based on what crates are in your dependencies.
-
ed25519-consensused25519-consensus = { git = "https://github.com/sp1-patches/ed25519-consensus", tag = "ed25519_consensus-v2.1.0-patch-v1" }Note: The curve operations for Ed25519 occur mainly inside of
curve25519-dalek-ng, but the crate also exposes au32_backendfeature flag which accelerates signature recovery by 10% over the defaultu64_backend, which is whyed25519-consensusis patched rather thaned25519-dalek. -
ed25519-dalekIf using
ed25519-dalekversion2.1, you can patch it with the following:curve25519-dalek = { git = "https://github.com/sp1-patches/curve25519-dalek", tag = "curve25519_dalek-v4.1.3-patch-v1" }If using
ed25519-dalekversion1.0.1, you can patch it with the following:ed25519-dalek = { git = "https://github.com/sp1-patches/ed25519-dalek", tag = "ed25519_dalek-v1.0.1-patch-v1" }Note: We need to patch the underlying Ed25519 curve operations in the
curve25519-dalekcrate.ed25519-dalekversion2.1usescurve25519-dalekversion4.1.3, while1.0.1uses3.2.0. For version2.1, we patchcurve25519-dalekdirectly, while for version1.0.1, we patched25519-dalek. -
curve25519-dalekcurve25519-dalek = { git = "https://github.com/sp1-patches/curve25519-dalek", tag = "curve25519_dalek-v4.1.3-patch-v1" } -
curve25519-dalek-ngcurve25519-dalek-ng = { git = "https://github.com/sp1-patches/curve25519-dalek-ng", tag = "curve25519_dalek_ng-v4.1.1-patch-v1" }
Secp256k1 Acceleration
To accelerate Secp256k1 operations, you'll need to patch k256 or secp256k1 depending on your usage.
Generally, if a crate you're using (ex. revm) has support for using k256 instead of secp256k1, you should use k256.
Patches
Apply the following patches based on what crates are in your dependencies.
-
k256ecdsa-core = { git = "https://github.com/sp1-patches/signatures", package = "ecdsa", tag = "ecdsa-v0.16.9-patch-v1" }Note: The curve operations for
k256are inside of theecdsa-corecrate, so you don't need to patchk256itself, and just patchingecdsa-coreis enough. -
secp256k1secp256k1 = { git = "https://github.com/sp1-patches/rust-secp256k1", tag = "secp256k1-v0.29.0-patch-v1" }
BN254 Acceleration
To accelerate BN254 (Also known as BN128 and Alt-BN128), you will need to patch the substrate-bn crate.
Patches
Apply the patch by adding the following to your list of dependencies:
#![allow(unused)]
fn main() {
substrate-bn = { git = "https://github.com/sp1-patches/bn", tag = "substrate_bn-v0.6.0-patch-v1" }
}
Performance Benchmarks for Patched substrate-bn in revm
| Operation | Standard substrate-bn Cycles | Patched substrate-bn Cycles | Times Faster |
|---|---|---|---|
| run-add | 170,298 | 111,615 | 1.52 |
| run-mul | 1,860,836 | 243,830 | 7.64 |
| run-pair | 255,627,625 | 11,528,503 | 22.15 |
Note: The operations run-add, run-mul, and run-pair are from the revm crate, specifically from the file crates/precompile/src/bn128.rs on GitHub. In the patched version of the substrate-bn crate, these functions utilize SP1's BN254 Fp precompiles.
To accelerate revm in SP1 using the BN254 patched crate, replace the substrate-bn crate with the patched crate by adding the following to crates/precompile/Cargo.toml:
bn = { git = "https://github.com/sp1-patches/bn", package = "substrate-bn", tag = "substrate_bn-v0.6.0-patch-v1" }
BLS12-381 Acceleration
To accelerate BLS12-381 operations, you'll need to patch the bls12_381 crate. Apply the following patch by adding the following to your list of dependencies:
bls12_381 = { git = "https://github.com/sp1-patches/bls12_381", tag = "bls12_381-v0.8.0-patch-v1" }
This patch significantly improves the performance of BLS12-381 operations, making it essential for applications that rely heavily on these cryptographic primitives.
Performance Benchmarks for Patched bls12_381 in kzg-rs
| Test | Unpatched Cycles | Patched Cycles | Improvement (x faster) |
|---|---|---|---|
| Verify blob KZG proof | 265,322,934 | 27,166,173 | 9.77x |
| Verify blob KZG proof batch (10 blobs) | 1,228,277,089 | 196,571,578 | 6.25x |
| Evaluate polynomial in evaluation form | 90,717,711 | 59,370,556 | 1.53x |
| Compute challenge | 63,400,511 | 57,341,532 | 1.11x |
| Verify KZG proof | 212,708,597 | 9,390,640 | 22.65x |
Troubleshooting
Verifying Patch Usage: Cargo
You can check if the patch was applied by using cargo's tree command to print the dependencies of the crate you patched.
cargo tree -p sha2@0.9.8
Next to the package name, it should have a link to the Github repository that you patched with.
Ex.
sha2 v0.9.8 (https://github.com/sp1-patches/RustCrypto-hashes?branch=patch-sha2-v0.9.8#afdbfb09)
├── ...
Verifying Patch Usage: SP1
To check if a precompile is used by your program, you can view SP1's ExecutionReport, which is returned when executing a program with execute. In ExecutionReport you can view the syscall_counts map to view if a specific syscall was used.
For example, if you wanted to check sha256 was used, you would look for SHA_EXTEND and SHA_COMPRESS in syscall_counts.
An example of this is available in our Patch Testing Example.
Cargo Version Issues
If you encounter issues with version commits on your patches, you should try updating the patched crate manually.
cargo update -p <patch-crate-name>
If you encounter issues relating to cargo / git, you can try setting CARGO_NET_GIT_FETCH_WITH_CLI:
CARGO_NET_GIT_FETCH_WITH_CLI=true cargo update -p <patch-crate-name>
You can permanently set this value in ~/.cargo/config:
[net]
git-fetch-with-cli = true
Precompiles
Precompiles are built into the SP1 zkVM and accelerate commonly used operations such as elliptic curve arithmetic and hashing. Under the hood, precompiles are implemented as custom STARK tables dedicated to proving one or few operations. They typically improve the performance of executing expensive operations in SP1 by a few orders of magnitude.
Inside the zkVM, precompiles are exposed as system calls executed through the ecall RISC-V instruction.
Each precompile has a unique system call number and implements an interface for the computation.
SP1 also has been designed specifically to make it easy for external contributors to create and extend the zkVM with their own precompiles. To learn more about this, you can look at implementations of existing precompiles in the precompiles folder. More documentation on this will be coming soon.
To use precompiles, we typically recommend you interact with them through patches, which are crates modified to use these precompiles under the hood, without requiring you to call system calls directly.
Specification
If you are an advanced user you can interact with the precompiles directly using external system calls.
Here is a list of all available system calls & precompiles.
//! Syscalls for the SP1 zkVM.
//!
//! Documentation for these syscalls can be found in the zkVM entrypoint
//! `sp1_zkvm::syscalls` module.

pub mod bls12381;
pub mod bn254;
pub mod ed25519;
pub mod io;
pub mod secp256k1;
pub mod secp256r1;
pub mod unconstrained;
pub mod utils;
#[cfg(feature = "verify")]
pub mod verify;

extern "C" {
    /// Halts the program with the given exit code.
    pub fn syscall_halt(exit_code: u8) -> !;

    /// Writes the bytes in the given buffer to the given file descriptor.
    pub fn syscall_write(fd: u32, write_buf: *const u8, nbytes: usize);

    /// Reads the bytes from the given file descriptor into the given buffer.
    pub fn syscall_read(fd: u32, read_buf: *mut u8, nbytes: usize);

    /// Executes the SHA-256 extend operation on the given word array.
    pub fn syscall_sha256_extend(w: *mut [u32; 64]);

    /// Executes the SHA-256 compress operation on the given word array and a given state.
    pub fn syscall_sha256_compress(w: *mut [u32; 64], state: *mut [u32; 8]);

    /// Executes an Ed25519 curve addition on the given points.
    pub fn syscall_ed_add(p: *mut [u32; 16], q: *const [u32; 16]);

    /// Executes an Ed25519 curve decompression on the given point.
    pub fn syscall_ed_decompress(point: &mut [u8; 64]);

    /// Executes an Sepc256k1 curve addition on the given points.
    pub fn syscall_secp256k1_add(p: *mut [u32; 16], q: *const [u32; 16]);

    /// Executes an Secp256k1 curve doubling on the given point.
    pub fn syscall_secp256k1_double(p: *mut [u32; 16]);

    /// Executes an Secp256k1 curve decompression on the given point.
    pub fn syscall_secp256k1_decompress(point: &mut [u8; 64], is_odd: bool);

    /// Executes an Secp256r1 curve addition on the given points.
    pub fn syscall_secp256r1_add(p: *mut [u32; 16], q: *const [u32; 16]);

    /// Executes an Secp256r1 curve doubling on the given point.
    pub fn syscall_secp256r1_double(p: *mut [u32; 16]);

    /// Executes an Secp256r1 curve decompression on the given point.
    pub fn syscall_secp256r1_decompress(point: &mut [u8; 64], is_odd: bool);

    /// Executes a Bn254 curve addition on the given points.
    pub fn syscall_bn254_add(p: *mut [u32; 16], q: *const [u32; 16]);

    /// Executes a Bn254 curve doubling on the given point.
    pub fn syscall_bn254_double(p: *mut [u32; 16]);

    /// Executes a BLS12-381 curve addition on the given points.
    pub fn syscall_bls12381_add(p: *mut [u32; 24], q: *const [u32; 24]);

    /// Executes a BLS12-381 curve doubling on the given point.
    pub fn syscall_bls12381_double(p: *mut [u32; 24]);

    /// Executes the Keccak-256 permutation on the given state.
    pub fn syscall_keccak_permute(state: *mut [u64; 25]);

    /// Executes an uint256 multiplication on the given inputs.
    pub fn syscall_uint256_mulmod(x: *mut [u32; 8], y: *const [u32; 8]);

    /// Executes a 256-bit by 2048-bit multiplication on the given inputs.
    pub fn syscall_u256x2048_mul(
        x: *const [u32; 8],
        y: *const [u32; 64],
        lo: *mut [u32; 64],
        hi: *mut [u32; 8],
    );
    /// Enters unconstrained mode.
    pub fn syscall_enter_unconstrained() -> bool;

    /// Exits unconstrained mode.
    pub fn syscall_exit_unconstrained();

    /// Defers the verification of a valid SP1 zkVM proof.
    pub fn syscall_verify_sp1_proof(vk_digest: &[u32; 8], pv_digest: &[u8; 32]);

    /// Returns the length of the next element in the hint stream.
    pub fn syscall_hint_len() -> usize;

    /// Reads the next element in the hint stream into the given buffer.
    pub fn syscall_hint_read(ptr: *mut u8, len: usize);

    /// Allocates a buffer aligned to the given alignment.
    pub fn sys_alloc_aligned(bytes: usize, align: usize) -> *mut u8;

    /// Decompresses a BLS12-381 point.
    pub fn syscall_bls12381_decompress(point: &mut [u8; 96], is_odd: bool);

    /// Computes a big integer operation with a modulus.
    pub fn sys_bigint(
        result: *mut [u32; 8],
        op: u32,
        x: *const [u32; 8],
        y: *const [u32; 8],
        modulus: *const [u32; 8],
    );

    /// Executes a BLS12-381 field addition on the given inputs.
    pub fn syscall_bls12381_fp_addmod(p: *mut u32, q: *const u32);

    /// Executes a BLS12-381 field subtraction on the given inputs.
    pub fn syscall_bls12381_fp_submod(p: *mut u32, q: *const u32);

    /// Executes a BLS12-381 field multiplication on the given inputs.
    pub fn syscall_bls12381_fp_mulmod(p: *mut u32, q: *const u32);

    /// Executes a BLS12-381 Fp2 addition on the given inputs.
    pub fn syscall_bls12381_fp2_addmod(p: *mut u32, q: *const u32);

    /// Executes a BLS12-381 Fp2 subtraction on the given inputs.
    pub fn syscall_bls12381_fp2_submod(p: *mut u32, q: *const u32);

    /// Executes a BLS12-381 Fp2 multiplication on the given inputs.
    pub fn syscall_bls12381_fp2_mulmod(p: *mut u32, q: *const u32);

    /// Executes a BN254 field addition on the given inputs.
    pub fn syscall_bn254_fp_addmod(p: *mut u32, q: *const u32);

    /// Executes a BN254 field subtraction on the given inputs.
    pub fn syscall_bn254_fp_submod(p: *mut u32, q: *const u32);

    /// Executes a BN254 field multiplication on the given inputs.
    pub fn syscall_bn254_fp_mulmod(p: *mut u32, q: *const u32);

    /// Executes a BN254 Fp2 addition on the given inputs.
    pub fn syscall_bn254_fp2_addmod(p: *mut u32, q: *const u32);

    /// Executes a BN254 Fp2 subtraction on the given inputs.
    pub fn syscall_bn254_fp2_submod(p: *mut u32, q: *const u32);

    /// Executes a BN254 Fp2 multiplication on the given inputs.
    pub fn syscall_bn254_fp2_mulmod(p: *mut u32, q: *const u32);

}
Cycle Tracking
When writing a program, it is useful to know how many RISC-V cycles a portion of the program takes to identify potential performance bottlenecks. SP1 provides a way to track the number of cycles spent in a portion of the program.
Tracking Cycles with Annotations
To track the number of cycles spent in a portion of the program, you can either put println!("cycle-tracker-start: block name") + println!("cycle-tracker-end: block name") statements (block name must be same between start and end) around the portion of your program you want to profile or use the #[sp1_derive::cycle_tracker] macro on a function. An example is shown below:
#![no_main]
sp1_zkvm::entrypoint!(main);

#[sp1_derive::cycle_tracker]
pub fn expensive_function(x: usize) -> usize {
    let mut y = 1;
    for _ in 0..100 {
        y *= x;
        y %= 7919;
    }
    y
}

pub fn main() {
    let mut nums = vec![1, 1];

    // Setup a large vector with Fibonacci-esque numbers.
    println!("cycle-tracker-start: setup");
    for _ in 0..100 {
        let mut c = nums[nums.len() - 1] + nums[nums.len() - 2];
        c %= 7919;
        nums.push(c);
    }
    println!("cycle-tracker-end: setup");

    println!("cycle-tracker-start: main-body");
    for i in 0..2 {
        let result = expensive_function(nums[nums.len() - i - 1]);
        println!("result: {}", result);
    }
    println!("cycle-tracker-end: main-body");
}
Note that to use the macro, you must add the sp1-derive crate to your dependencies for your program.
[dependencies]
sp1-derive = "3.0.0"
In the script for proof generation, setup the logger with utils::setup_logger() and run the script with RUST_LOG=info cargo run --release. You should see the following output:
$ RUST_LOG=info cargo run --release
    Finished release [optimized] target(s) in 0.21s
     Running `target/release/cycle-tracking-script`
2024-03-13T02:03:40.567500Z  INFO execute: loading memory image
2024-03-13T02:03:40.567751Z  INFO execute: starting execution
2024-03-13T02:03:40.567760Z  INFO execute: clk = 0 pc = 0x2013b8
2024-03-13T02:03:40.567822Z  INFO execute: ┌╴setup
2024-03-13T02:03:40.568095Z  INFO execute: └╴4,398 cycles
2024-03-13T02:03:40.568122Z  INFO execute: ┌╴main-body
2024-03-13T02:03:40.568149Z  INFO execute: │ ┌╴expensive_function
2024-03-13T02:03:40.568250Z  INFO execute: │ └╴1,368 cycles
stdout: result: 5561
2024-03-13T02:03:40.568373Z  INFO execute: │ ┌╴expensive_function
2024-03-13T02:03:40.568470Z  INFO execute: │ └╴1,368 cycles
stdout: result: 2940
2024-03-13T02:03:40.568556Z  INFO execute: └╴5,766 cycles
2024-03-13T02:03:40.568566Z  INFO execute: finished execution clk = 11127 pc = 0x0
2024-03-13T02:03:40.569251Z  INFO execute: close time.busy=1.78ms time.idle=21.1µs
Note that we elegantly handle nested cycle tracking, as you can see above.
Get Tracked Cycle Counts
To include tracked cycle counts in the ExecutionReport when using ProverClient::execute, use the following annotations:
fn main() {
  println!("cycle-tracker-report-start: block name");
  // ...
  println!("cycle-tracker-report-end: block name");
}
This will log the cycle count for block name and include it in the ExecutionReport in the cycle_tracker map.
Tracking Cycles with Tracing
The cycle-tracker annotation is a convenient way to track cycles for specific sections of code. However, sometimes it can also be useful to track what functions are taking the most cycles across the entire program, without having to annotate every function individually.
First, we need to generate a trace file of the program counter at each cycle while the program is executing. This can be done by simply setting the TRACE_FILE environment variable with the path of the file you want to write the trace to. For example, you can run the following command in the script directory for any example program:
TRACE_FILE=trace.log RUST_LOG=info cargo run --release
When the TRACE_FILE environment variable is set, as SP1's RISC-V runtime is executing, it will write a log of the program counter to the file specified by TRACE_FILE.
Next, we can use the cargo prove CLI with the trace command to analyze the trace file and generate a table of instruction counts. This can be done with the following command:
cargo prove trace --elf <path_to_program_elf> --trace <path_to_trace_file>
The trace command will generate a table of instruction counts, sorted by the number of cycles spent in each function. The output will look something like this:
  [00:00:00] [########################################] 17053/17053 (0s)

Total instructions in trace: 17053


 Instruction counts considering call graph
+----------------------------------------+-------------------+
| Function Name                          | Instruction Count |
| __start                                | 17045             |
| main                                   | 12492             |
| sp1_zkvm::syscalls::halt::syscall_halt | 4445              |
| sha2::sha256::compress256              | 4072              |
| sp1_lib::io::commit                    | 258               |
| sp1_lib::io::SyscallWriter::write      | 255               |
| syscall_write                          | 195               |
| memcpy                                 | 176               |
| memset                                 | 109               |
| sp1_lib::io::read_vec                  | 71                |
| __rust_alloc                           | 29                |
| sp1_zkvm::heap::SimpleAlloc::alloc     | 22                |
| syscall_hint_len                       | 3                 |
| syscall_hint_read                      | 2                 |
+----------------------------------------+-------------------+


 Instruction counts ignoring call graph
+----------------------------------------+-------------------+
| Function Name                          | Instruction Count |
| main                                   | 12075             |
| sha2::sha256::compress256              | 4073              |
| sp1_zkvm::syscalls::halt::syscall_halt | 219               |
| memcpy                                 | 180               |
| syscall_write                          | 123               |
| memset                                 | 111               |
| sp1_lib::io::commit                    | 88                |
| sp1_lib::io::SyscallWriter::write      | 60                |
| __start                                | 45                |
| sp1_lib::io::read_vec                  | 35                |
| sp1_zkvm::heap::SimpleAlloc::alloc     | 23                |
| anonymous                              | 7                 |
| __rust_alloc                           | 7                 |
| syscall_hint_len                       | 4                 |
| syscall_hint_read                      | 3                 |
+----------------------------------------+-------------------+
Proof Aggregation
SP1 supports proof aggregation and recursion, which allows you to verify an SP1 proof within SP1. Use cases include:
- Reducing on-chain verification costs by aggregating multiple SP1 proofs into a single SP1 proof.
- Proving logic that is split into multiple proofs, such as proving a statement about a rollup's state transition function by proving each block individually and aggregating these proofs to produce a final proof of a range of blocks.
For an example of how to use proof aggregation and recursion in SP1, refer to the aggregation example.
Note that to verify an SP1 proof inside SP1, you must generate a "compressed" SP1 proof (see Proof Types for more details).
When to use aggregation
Note that by itself, SP1 can already prove arbitrarily large programs by chunking the program's execution into multiple "shards" (contiguous batches of cycles) and generating proofs for each shard in parallel, and then recursively aggregating the proofs. Thus, aggregation is generally not necessary for most use-cases, as SP1's proving for large programs is already parallelized. However, aggregation can be useful for aggregating computations that require more than the zkVM's limited (~2GB) memory or for aggregating multiple SP1 proofs from different parties into a single proof to save on onchain verification costs.
Verifying Proofs inside the zkVM
To verify a proof inside the zkVM, you can use the sp1_zkvm::lib::verify::verify_sp1_proof function.
sp1_zkvm::lib::verify::verify_sp1_proof(vkey, public_values_digest);
You do not need to pass in the proof as input into the syscall, as the proof will automatically be read for the proof input stream by the prover.
Note that you must include the verify feature in your Cargo.toml for sp1-zkvm to be able to use the verify_proof function (like this).
Generating Proofs with Aggregation
To provide an existing proof as input to the SP1 zkVM, you can use the existing SP1Stdin object
which is already used for all inputs to the zkVM.
Generating proving key and verifying key.
let (input_pk, input_vk) = client.setup(PROOF_INPUT_ELF);
let (aggregation_pk, aggregation_vk) = client.setup(AGGREGATION_ELF);

// Generate a proof that will be recursively verified / aggregated. Note that we use the "compressed"
// proof type, which is necessary for aggregation.
let mut stdin = SP1Stdin::new();
let input_proof = client
    .prove(&input_pk, stdin)
    .compressed()
    .run()
    .expect("proving failed");

// Create a new stdin object to write the proof and the corresponding verifying key to.
let mut stdin = SP1Stdin::new();
stdin.write_proof(input_proof, input_vk);

// Generate a proof that will recursively verify / aggregate the input proof.
let aggregation_proof = client
    .prove(&aggregation_pk, stdin)
    .compressed()
    .run()
    .expect("proving failed");
Generating Proofs: Setup
In this section, we will teach you how to setup a self-contained crate which can generate proofs of programs that have been compiled with the SP1 toolchain inside the SP1 zkVM, using the sp1-sdk crate.
CLI (Recommended)
The recommended way to setup your first program to prove inside the zkVM is using the method described in Quickstart which will create a script folder.
cargo prove new <name>
cd script
Manual
You can also manually setup a project. First create a new cargo project:
cargo new script
cd script
Cargo Manifest
Inside this crate, add the sp1-sdk crate as a dependency. Your Cargo.toml should look like as follows:
[workspace]
[package]
version = "0.1.0"
name = "script"
edition = "2021"

[dependencies]
sp1-sdk = "3.0.0"
The sp1-sdk crate includes the necessary utilities to generate, save, and verify proofs.
Generating Proofs: Basics
All the methods you'll need for generating proofs are included in the sp1_sdk crate. Most importantly, you'll need to use the ProverClient to setup a proving key and verifying key for your program and then use the execute, prove and verify methods to execute your program, and generate and verify proofs.
To make this more concrete, let's walk through a simple example of generating a proof for a Fibonacci program inside the zkVM.
Example: Fibonacci
use sp1_sdk::{include_elf, utils, ProverClient, SP1ProofWithPublicValues, SP1Stdin};

/// The ELF we want to execute inside the zkVM.
const ELF: &[u8] = include_elf!("fibonacci-program");

fn main() {
    // Setup logging.
    utils::setup_logger();

    // Create an input stream and write '500' to it.
    let n = 1000u32;

    // The input stream that the program will read from using `sp1_zkvm::io::read`. Note that the
    // types of the elements in the input stream must match the types being read in the program.
    let mut stdin = SP1Stdin::new();
    stdin.write(&n);

    // Create a `ProverClient` method.
    let client = ProverClient::new();

    // Execute the program using the `ProverClient.execute` method, without generating a proof.
    let (_, report) = client.execute(ELF, stdin.clone()).run().unwrap();
    println!("executed program with {} cycles", report.total_instruction_count());

    // Generate the proof for the given program and input.
    let (pk, vk) = client.setup(ELF);
    let mut proof = client.prove(&pk, stdin).run().unwrap();

    println!("generated proof");

    // Read and verify the output.
    //
    // Note that this output is read from values committed to in the program using
    // `sp1_zkvm::io::commit`.
    let _ = proof.public_values.read::<u32>();
    let a = proof.public_values.read::<u32>();
    let b = proof.public_values.read::<u32>();

    println!("a: {}", a);
    println!("b: {}", b);

    // Verify proof and public values
    client.verify(&proof, &vk).expect("verification failed");

    // Test a round trip of proof serialization and deserialization.
    proof.save("proof-with-pis.bin").expect("saving proof failed");
    let deserialized_proof =
        SP1ProofWithPublicValues::load("proof-with-pis.bin").expect("loading proof failed");

    // Verify the deserialized proof.
    client.verify(&deserialized_proof, &vk).expect("verification failed");

    println!("successfully generated and verified proof for the program!")
}
You can run the above script in the script directory with RUST_LOG=info cargo run --release. Note that running the above script will generate a proof locally.
We recommend using the prover network to generate proofs. Read more about the recommended workflow for developing with SP1.
Proof Types
There are a few different types of proofs that can be generated by the SP1 zkVM. Each proof type has its own tradeoffs in terms of proof generation time, verification cost, and proof size.
The ProverClient follows a "builder" pattern that allows you to configure the proof type and other options after creating a ProverClient and calling prove on it.
For a full list of options, see the following docs.
Core (Default)
The default prover mode generates a list of STARK proofs that in aggregate have size proportional to the size of the execution. Use this in settings where you don't care about verification cost / proof size.
let client = ProverClient::new();
client.prove(&pk, stdin).run().unwrap();
Compressed
The compressed prover mode generates STARK proofs that have constant size. Use this in settings where you care about verification cost / proof size, but not onchain verification. Compressed proofs are also useful because they can be cheaply recursively verified within SP1 itself (see the proof aggregation section).
let client = ProverClient::new();
client.prove(&pk, stdin).compressed().run().unwrap();
Groth16 (Recommended)
The Groth16 prover mode generates a SNARK proof that is ~260 bytes large and can be verified onchain for around ~270k gas.
The trusted setup for the Groth16 circuit keys uses the Aztec Ignition ceremony + entropy contributions from members of the Succinct team. If you are uncomfortable with the security assumptions of the ceremony, you can use the PLONK proof type instead.
let client = ProverClient::new();
client.prove(&pk, stdin).groth16().run().unwrap();
PLONK
The PLONK prover mode generates a SNARK proof that is ~868 bytes large and can also be verified onchain for around ~300k gas. Plonk proofs take about ~1m30s longer to generate over a compressed proof.
PLONK does not require a trusted setup and reuses contributions from the Aztec Ignition ceremony.
let client = ProverClient::new();
client.prove(&pk, stdin).plonk().run().unwrap();
Recommended Workflow for Developing with SP1
We recommend the following workflow for developing with SP1.
Step 1: Iterate on your program with execution only
While iterating on your SP1 program, you should only execute the program with the RISC-V runtime. This will allow you to verify the correctness of your program and test the SP1Stdin as well as the SP1PublicValues that are returned, without having to generate a proof (which can be slow and/or expensive). If the execution of your program succeeds, then proof generation should succeed as well!
use sp1_sdk::{include_elf, utils, ProverClient, SP1Stdin};

/// The ELF we want to execute inside the zkVM.
const ELF: &[u8] = include_elf!("fibonacci-program");

fn main() {
    // Setup logging.
    utils::setup_logger();

    // Create an input stream and write '500' to it.
    let n = 500u32;

    let mut stdin = SP1Stdin::new();
    stdin.write(&n);

    // Only execute the program and get a `SP1PublicValues` object.
    let client = ProverClient::new();
    let (mut public_values, execution_report) = client.execute(ELF, stdin).run().unwrap();

    // Print the total number of cycles executed and the full execution report with a breakdown of
    // the RISC-V opcode and syscall counts.
    println!(
        "Executed program with {} cycles",
        execution_report.total_instruction_count() + execution_report.total_syscall_count()
    );
    println!("Full execution report:\n{:?}", execution_report);

    // Read and verify the output.
    let _ = public_values.read::<u32>();
    let a = public_values.read::<u32>();
    let b = public_values.read::<u32>();

    println!("a: {}", a);
    println!("b: {}", b);
}
Note that printing out the total number of executed cycles and the full execution report provides helpful insight into proof generation latency and cost either for local proving or when using the prover network.
Crate Setup: We recommend that your program crate that defines the main function (around which you wrap the sp1_zkvm::entrypoint! macro) should be kept minimal. Most of your business logic should be in a separate crate (in the same repo/workspace) that can be tested independently and that is not tied to the SP1 zkVM. This will allow you to unit test your program logic without having to worry about the zkvm compilation target. This will also allow you to efficient reuse types between your program crate and your crate that generates proofs.
Step 2: Generate proofs
After you have iterated on your program and finalized that it works correctly, you can generate proofs for your program for final end to end testing or production use.
Generating proofs on the prover network (recommended)
Using Succinct's prover prover network will generally be faster and cheaper than local proving, as it parallelizes proof generation amongst multiple machines and also uses SP1's GPU prover that is not yet available for local proving. Follow the setup instructions to get started with the prover network. Using the prover network only requires adding 1 environment variable from a regular SP1 proof generation script with the ProverClient.
There are a few things to keep in mind when using the prover network.
Prover Network FAQ
Benchmarking latency on the prover network
The prover network currently parallelizes proof generation across multiple machines. This means the latency of proof generation does not scale linearly with the number of cycles of your program, but rather with the number of cycles of your program divided by the number of currently available machines on the prover network.
Our prover network currently has limited capacity because it is still in beta. If you have an extremely latency sensitive use-case and you want to figure out the minimal latency possible for your program, you should reach out to us and we can onboard you to our reserved capacity cluster that has a dedicated instances that can significantly reduce latency.
Costs on the prover network
The cost of proof generation on the prover network scales approximately linearly with the number of cycles of your program (along with the number of syscalls that your program makes). For larger workloads with regular proof frequency (like rollups and light clients), we can offer discounted pricing. To figure out how much your program will cost to prove, you can get in touch with us to discuss pricing options.
Note that latency is not the same as cost, because we parallelize proof generation across multiple machines, so two proofs with the same latency can be using a different number of machines, impacting the cost.
Benchmarking on small vs. large programs
In SP1, there is a fixed overhead for proving that is independent of your program's cycle count. This means that benchmarking on small programs is not representative of the performance of larger programs. To get an idea of the scale of programs for real-world workloads, you can refer to our benchmarking blog post and also some numbers below:
- An average Ethereum block can be between 100-500M cycles (including merkle proof verification for storage and execution of transactions) with our
keccakandsecp256k1precompiles. - For a Tendermint light client, the average cycle count can be between 10M and 50M cycles (including our ed25519 precompiles).
- We consider programs with <2M cycles to be "small" and by default, the fixed overhead of proving will dominate the proof latency. If latency is incredibly important for your use-case, we can specialize the prover network for your program if you reach out to us.
Note that if you generate Groth16 or PLONK proofs on the prover network, you will encounter a fixed overhead for the STARK -> SNARK wrapping step. We're actively working on reducing this overhead in future releases.
On-Demand vs. Reserved Capacity
The prover network is currently in beta and has limited capacity. For high volume use-cases, we can offer discounted pricing and a reserved capacity cluster that has a dedicated instances that can significantly reduce latency and have higher throughput and guaranteed SLAs.
Generating proofs locally
If you want to generate proofs locally, you can use the sp1_sdk crate to generate proofs locally as outlined in the Basics section. By default, the ProverClient will generate proofs locally using your CPU. Check out the hardware requirements for locally proving here.
Prover Network Beta
See Supported Versions for the currently supported versions of SP1 on the Prover Network.
Succinct has been building the Succinct Prover Network, a distributed network of provers that can generate proofs of any size quickly and reliably. It's currently in private beta, but you can get access by following the steps below.
To get started, FILL OUT THIS FORM to gain access to the Succinct Network. Completing this form requires you to complete the key setup steps below.
Note: The Succinct Prover Network requires access to your program and entire input, so that provers can generate a proof, meaning your input does not remain private to provers on the network. If you are using SP1 for its zero-knowledge properties, you should either run proof generation on a local machine (recommended), or understand the honesty assumptions required of provers of the network.
Prover Network: Key Setup
The prover network uses Secp256k1 keypairs for authentication, similar to Ethereum wallets. You may generate a new keypair explicitly for use with the prover network, or use an existing keypair.
You do not need to hold any funds in this account, it is used solely for access control.
Generate a Public Key
Prover network keypair credentials can be generated using the cast CLI tool.
First install Foundry:
curl -L https://foundry.paradigm.xyz | bash
Upon running this command, you will be prompted to source your shell profile and run foundryup. Afterwards you should have access to the cast command.
Use cast to generate a new keypair:
cast wallet new
which will give you an output similar to this:

The "Address" what you should submit in the form, in the example above this is 0x552f0FC6D736ed965CE07a3D71aA639De15B627b. The "Private key" should be kept safe and
secure. When interacting with the network, you will set your SP1_PRIVATE_KEY environment variable
to this value.
Retrieve an Existing Key
If you already have an existing key you would like to use, you can also use cast retrieve your address:
cast wallet address --private-key $PRIVATE_KEY
Prover Network: Usage
See Supported Versions for the currently supported versions of SP1 on the Prover Network.
Sending a proof request
To use the prover network to generate a proof, you can run your script that uses sp1_sdk::ProverClient as you would normally but with additional environment variables set:
// Generate the proof for the given program.
let client = ProverClient::new();
let (pk, vk) = client.setup(ELF);
let mut proof = client.prove(&pk, stdin).run().unwrap();
SP1_PROVER=network SP1_PRIVATE_KEY=... RUST_LOG=info cargo run --release
-
SP1_PROVERshould be set tonetworkwhen using the prover network. -
SP1_PRIVATE_KEYshould be set to your private key. You will need to be using a whitelisted key to use the network.
When you call any of the prove functions in ProverClient now, it will first simulate your program, then wait for it to be proven through the network and finally return the proof.
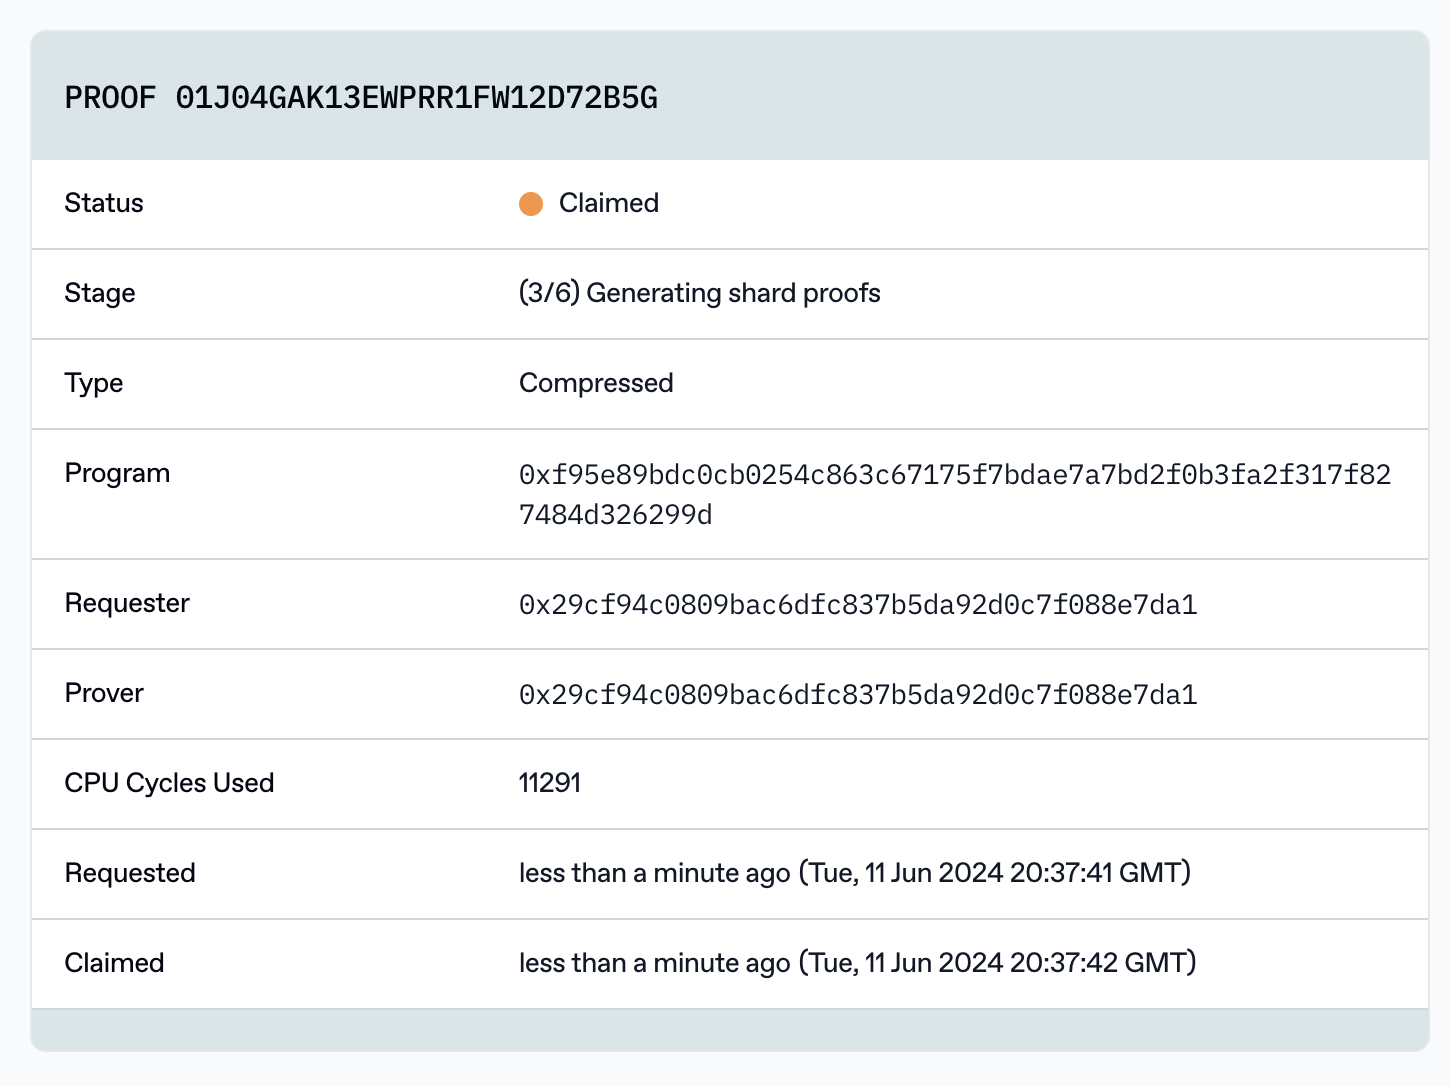
View the status of your proof
You can view your proof and other running proofs on the explorer. The page for your proof will show details such as the stage of your proof and the cycles used. It also shows the program hash which is the keccak256 of the program bytes.
Advanced Usage
Skip simulation
To skip the simulation step and directly submit the program for proof generation, you can set the SKIP_SIMULATION environment variable to true. This will save some time if you are sure that your program is correct. If your program panics, the proof will fail and ProverClient will panic.
Use NetworkProver directly
By using the sp1_sdk::NetworkProver struct directly, you can call async functions directly and have programmatic access to the proof ID and download proofs by ID.
impl NetworkProver {
    /// Creates a new [NetworkProver] with the private key set in `SP1_PRIVATE_KEY`.
    pub fn new() -> Self;

    /// Creates a new [NetworkProver] with the given private key.
    pub fn new_from_key(private_key: &str);

    /// Requests a proof from the prover network, returning the proof ID.
    pub async fn request_proof(
        &self,
        elf: &[u8],
        stdin: SP1Stdin,
        mode: ProofMode,
    ) -> Result<String>;

    /// Waits for a proof to be generated and returns the proof. If a timeout is supplied, the
    /// function will return an error if the proof is not generated within the timeout.
    pub async fn wait_proof(
        &self,
        proof_id: &str,
        timeout: Option<Duration>,
    ) -> Result<SP1ProofWithPublicValues>;

    /// Get the status and the proof if available of a given proof request. The proof is returned
    /// only if the status is Fulfilled.
    pub async fn get_proof_status(
        &self,
        proof_id: &str,
    ) -> Result<(GetProofStatusResponse, Option<SP1ProofWithPublicValues>)>;

    /// Requests a proof from the prover network and waits for it to be generated.
    pub async fn prove(
        &self,
        elf: &[u8],
        stdin: SP1Stdin,
        mode: ProofMode,
        timeout: Option<Duration>,
    ) -> Result<SP1ProofWithPublicValues>;
}
Supported Versions
The prover network currently only supports specific versions of SP1:
| Version | Description |
|---|---|
| v3.X.X | V3 Release. Latest performant & production ready version. |
X denotes that any minor and patch version is supported (e.g. v2.1.0, v2.1.1).
If you submit a proof request to the prover network and you are not using a supported version, you will receive an error message.
Changing versions
You must switch to a supported version before submitting a proof. To do so, replace the sp1-zkvm version in your program's Cargo.toml:
[dependencies]
sp1-zkvm = "3.0.0"
replace the sp1-sdk version in your script's Cargo.toml:
[dependencies]
sp1-sdk = "3.0.0"
Re-build your program and script, and then try again.
Hardware Acceleration
SP1 supports hardware acceleration on the following platforms:
- AVX256/AVX512 on x86 CPUs
- CUDA on Nvidia GPUs
To enable hardware acceleration, please refer to the platform specific instructions available in this section.
AVX
SP1 supports both AVX256 and AVX512 acceleration on x86 CPUs due to support in Plonky3. Whenever possible, we recommend using AVX512 acceleration as it provides better performance.
Checking for AVX
To check if your CPU supports AVX, you can run the following command:
grep avx /proc/cpuinfo
Look for the flags avx2 and avx512.
Enabling AVX256
To enable AVX256 acceleration, you can set the RUSTFLAGS environment variable to include the following flags:
RUSTFLAGS="-C target-cpu=native" cargo run --release
Enabling AVX512
To enable AVX512 acceleration, you can set the RUSTFLAGS environment variable to include the following flags:
RUSTFLAGS="-C target-cpu=native -C target-feature=+avx512f" cargo run --release
Note that the +avx512f flag is required to enable AVX512 acceleration.
CUDA
SP1 supports CUDA acceleration, which can provide dramatically better latency and cost performance compared to using the CPU prover, even with AVX acceleration.
Software Requirements
Please make sure you have the following installed before using the CUDA prover:
Hardware Requirements
- CPU: We recommend having at least 8 CPU cores with 32GB of RAM available to fully utilize the GPU.
- GPU: 24GB or more for core/compressed proofs, 40GB or more for shrink/wrap proofs
Usage
To use the CUDA prover, you can compile the sp1-sdk crate with the cuda feature enabled. You
can use the normal methods on the ProverClient to generate proofs.
FAQ
Logging and Tracing Information
You can use sp1_sdk::utils::setup_logger() to enable logging information respectively. You can set the logging level with the RUST_LOG environment variable.
sp1_sdk::utils::setup_logger();
Example of setting the logging level to info (other options are debug, trace, and warn):
RUST_LOG=info cargo run --release
Onchain Verification: Setup
The best way to get started with verifying SP1 proofs on-chain is to refer to the SP1 Project Template.
- The template program shows how to write outputs that can be decoded in Solidity.
- The template script shows how to generate the proof using the SDK and save it to a file.
- The template contract shows how to verify the proof onchain using Solidity.
Refer to the section on Contract Addresses for the addresses of the deployed verifiers.
Generating SP1 Proofs for Onchain Verification
By default, the proofs generated by SP1 are not verifiable onchain, as they are non-constant size and STARK verification on Ethereum is very expensive. To generate a proof that can be verified onchain, we use performant STARK recursion to combine SP1 shard proofs into a single STARK proof and then wrap that in a SNARK proof. Our ProverClient has a prover option for this called plonk. Behind the scenes, this function will first generate a normal SP1 proof, then recursively combine all of them into a single proof using the STARK recursion protocol. Finally, the proof is wrapped in a SNARK proof using PLONK.
WARNING: The Groth16 and PLONK provers are only guaranteed to work on official releases of SP1. To use Groth16 or PLONK proving & verification locally, ensure that you have Docker installed and have at least 32GB of RAM. Note that you might need to increase the memory limit for docker desktop if you're running on Mac.
Example
{{#include ../../examples/fibonacci/script/bin/groth16_bn254.rs}}
You can run the above script with RUST_LOG=info cargo run --bin groth16_bn254 --release in examples/fibonacci/script.
Using Groth16 and PLONK without Docker (Advanced)
If you would like to run the Groth16 or PLONK prover directly without Docker, you must have Go 1.22 installed and enable the native-gnark feature in sp1-sdk. This path is not recommended and may require additional native dependencies.
sp1-sdk = { version = "3.0.0", features = ["native-gnark"] }
Solidity Verifier
We maintain a suite of contracts used for verifying SP1 proofs onchain. We highly recommend using Foundry.
Installation
To install the latest release version:
forge install succinctlabs/sp1-contracts
To install a specific version:
forge install succinctlabs/sp1-contracts@<version>
Finally, add @sp1-contracts/=lib/sp1-contracts/contracts/src/ in remappings.txt.
Usage
Once installed, you can use the contracts in the library by importing them:
// SPDX-License-Identifier: MIT
pragma solidity ^0.8.20;

import {ISP1Verifier} from "@sp1-contracts/ISP1Verifier.sol";

/// @title Fibonacci.
/// @author Succinct Labs
/// @notice This contract implements a simple example of verifying the proof of a computing a
///         fibonacci number.
contract Fibonacci {
    /// @notice The address of the SP1 verifier contract.
    /// @dev This can either be a specific SP1Verifier for a specific version, or the
    ///      SP1VerifierGateway which can be used to verify proofs for any version of SP1.
    ///      For the list of supported verifiers on each chain, see:
    ///      https://docs.succinct.xyz/onchain-verification/contract-addresses
    address public verifier;

    /// @notice The verification key for the fibonacci program.
    bytes32 public fibonacciProgramVKey;

    constructor(address _verifier, bytes32 _fibonacciProgramVKey) {
        verifier = _verifier;
        fibonacciProgramVKey = _fibonacciProgramVKey;
    }

    /// @notice The entrypoint for verifying the proof of a fibonacci number.
    /// @param _proofBytes The encoded proof.
    /// @param _publicValues The encoded public values.
    function verifyFibonacciProof(bytes calldata _publicValues, bytes calldata _proofBytes)
        public
        view
        returns (uint32, uint32, uint32)
    {
        ISP1Verifier(verifier).verifyProof(fibonacciProgramVKey, _publicValues, _proofBytes);
        (uint32 n, uint32 a, uint32 b) = abi.decode(_publicValues, (uint32, uint32, uint32));
        return (n, a, b);
    }
}
Finding your program vkey
The program vkey (fibonacciProgramVKey in the example above) is passed into the ISP1Verifier along with the public values and proof bytes. You
can find your program vkey by going through the following steps:
- Find what version of SP1 crates you are using.
- Use the version from step to run this command:
sp1up --version <version> - Use the vkey command to get the program vkey:
cargo prove vkey -elf <path/to/elf>
Alternatively, you can set up a simple script to do this using the sp1-sdk crate:
fn main() {
    // Setup the logger.
    sp1_sdk::utils::setup_logger();

    // Setup the prover client.
    let client = ProverClient::new();

    // Setup the program.
    let (_, vk) = client.setup(FIBONACCI_ELF);

    // Print the verification key.
    println!("Program Verification Key: {}", vk.bytes32());
}
Testing
To test the contract, we recommend setting up Foundry Tests. We have an example of such a test in the SP1 Project Template.
Solidity Versions
The officially deployed contracts are built using Solidity 0.8.20 and exist on the sp1-contracts main branch.
If you need to use different versions that are compatible with your contracts, there are also other branches you can install that contain different versions. For example for branch main-0.8.15 contains the contracts with:
pragma solidity ^0.8.15;
and you can install it with:
forge install succinctlabs/sp1-contracts@main-0.8.15
If there is different versions that you need but there aren't branches for them yet, please ask in the SP1 Telegram.
Contract Addresses
The current officially supported version of SP1 is V3.0.0.
All previous versions are deprecated and may not work as expected on the gateways.
To verify SP1 proofs on-chain, we recommend using our deployed canonical verifier gateways. The SP1VerifierGateway will automatically route your SP1 proof to the correct verifier based on the SP1 version used.
Canonical Verifier Gateways
There are different verifier gateway for each proof system: Groth16 and PLONK. This means that you must use the correct verifier gateway depending on if you are verifying a Groth16 or PLONK proof.
Groth16
| Chain ID | Chain | Gateway |
|---|---|---|
| 1 | Mainnet | 0x397A5f7f3dBd538f23DE225B51f532c34448dA9B |
| 11155111 | Sepolia | 0x397A5f7f3dBd538f23DE225B51f532c34448dA9B |
| 17000 | Holesky | 0x397A5f7f3dBd538f23DE225B51f532c34448dA9B |
| 42161 | Arbitrum One | 0x397A5f7f3dBd538f23DE225B51f532c34448dA9B |
| 421614 | Arbitrum Sepolia | 0x397A5f7f3dBd538f23DE225B51f532c34448dA9B |
| 8453 | Base | 0x397A5f7f3dBd538f23DE225B51f532c34448dA9B |
| 84532 | Base Sepolia | 0x397A5f7f3dBd538f23DE225B51f532c34448dA9B |
| 10 | Optimism | 0x397A5f7f3dBd538f23DE225B51f532c34448dA9B |
| 11155420 | Optimism Sepolia | 0x397A5f7f3dBd538f23DE225B51f532c34448dA9B |
| 534351 | Scroll Sepolia | 0x397A5f7f3dBd538f23DE225B51f532c34448dA9B |
| 534352 | Scroll | 0x397A5f7f3dBd538f23DE225B51f532c34448dA9B |
PLONK
| Chain ID | Chain | Gateway |
|---|---|---|
| 1 | Mainnet | 0x3B6041173B80E77f038f3F2C0f9744f04837185e |
| 11155111 | Sepolia | 0x3B6041173B80E77f038f3F2C0f9744f04837185e |
| 17000 | Holesky | 0x3B6041173B80E77f038f3F2C0f9744f04837185e |
| 42161 | Arbitrum One | 0x3B6041173B80E77f038f3F2C0f9744f04837185e |
| 421614 | Arbitrum Sepolia | 0x3B6041173B80E77f038f3F2C0f9744f04837185e |
| 8453 | Base | 0x3B6041173B80E77f038f3F2C0f9744f04837185e |
| 84532 | Base Sepolia | 0x3B6041173B80E77f038f3F2C0f9744f04837185e |
| 10 | Optimism | 0x3B6041173B80E77f038f3F2C0f9744f04837185e |
| 11155420 | Optimism Sepolia | 0x3B6041173B80E77f038f3F2C0f9744f04837185e |
| 534351 | Scroll Sepolia | 0x3B6041173B80E77f038f3F2C0f9744f04837185e |
| 534352 | Scroll | 0x3B6041173B80E77f038f3F2C0f9744f04837185e |
The most up-to-date reference on each chain can be found in the deployments directory in the SP1 contracts repository, where each chain has a dedicated JSON file with each verifier's address.
Versioning Policy
Whenever a verifier for a new SP1 version is deployed, the gateway contract will be updated to support it with addRoute(). If a verifier for an SP1 version has an issue, the route will be frozen with freezeRoute().
On mainnets, only official versioned releases are deployed and added to the gateway. Testnets have
rc versions of the verifier deployed supported in addition to the official versions.
Deploying to other Chains
In the case that you need to use a chain that is not listed above, you can deploy your own verifier contract by following the instructions in the SP1 Contracts Repo.
Since both the SP1VerifierGateway and each SP1Verifier implement the ISP1Verifier
interface, you can choose to either:
- Deploy the
SP1VerifierGatewayand addSP1Verifiercontracts to it. Then point to theSP1VerifierGatewayaddress in your contracts. - Deploy just the
SP1Verifiercontract that you want to use. Then point to theSP1Verifieraddress in your contracts.
If you want support for a canonical verifier on your chain, contact us here. We often deploy canonical verifiers on new chains if there's enough demand.
ISP1Verifier Interface
All verifiers implement the ISP1Verifier interface.
// SPDX-License-Identifier: MIT
pragma solidity ^0.8.20;

/// @title SP1 Verifier Interface
/// @author Succinct Labs
/// @notice This contract is the interface for the SP1 Verifier.
interface ISP1Verifier {
    /// @notice Verifies a proof with given public values and vkey.
    /// @dev It is expected that the first 4 bytes of proofBytes must match the first 4 bytes of
    /// target verifier's VERIFIER_HASH.
    /// @param programVKey The verification key for the RISC-V program.
    /// @param publicValues The public values encoded as bytes.
    /// @param proofBytes The proof of the program execution the SP1 zkVM encoded as bytes.
    function verifyProof(
        bytes32 programVKey,
        bytes calldata publicValues,
        bytes calldata proofBytes
    ) external view;
}
Offchain Verification
Rust no_std Verification
You can verify SP1 Groth16 and Plonk proofs in no_std environments with sp1-verifier.
sp1-verifier is also patched to verify Groth16 and Plonk proofs within the SP1 zkVM, using
bn254 precompiles. For an example of this, see
the Groth16 Example.
Installation
Import the following dependency in your Cargo.toml. Note that the sp1-verifier crate was added in version 3.2.1.
sp1-verifier = {version = "3.2.1", default-features = false}
Usage
sp1-verifier's interface is very similar to the solidity verifier's. It exposes two public functions:
Groth16Verifier::verify_proof
and PlonkVerifier::verify_proof.
sp1-verifier also exposes the Groth16 and Plonk verifying keys as constants, GROTH16_VK_BYTES and PLONK_VK_BYTES. These
keys correspond to the current SP1 version's official Groth16 and Plonk verifying keys, which are used for verifying proofs generated
using docker or the prover network.
First, generate your groth16/plonk proof with the SP1 SDK. See here
for more information -- sp1-verifier and the solidity verifier expect inputs in the same format.
Next, verify the proof with sp1-verifier. The following snippet is from the Groth16 example program, which verifies a Groth16 proof within SP1 using sp1-verifier.
//! A program that verifies a Groth16 proof in SP1.

#![no_main]
sp1_zkvm::entrypoint!(main);

use sp1_verifier::Groth16Verifier;

pub fn main() {
    // Read the proof, public values, and vkey hash from the input stream.
    let proof = sp1_zkvm::io::read_vec();
    let sp1_public_values = sp1_zkvm::io::read_vec();
    let sp1_vkey_hash: String = sp1_zkvm::io::read();

    // Verify the groth16 proof.
    let groth16_vk = *sp1_verifier::GROTH16_VK_BYTES;
    println!("cycle-tracker-start: verify");
    let result = Groth16Verifier::verify(&proof, &sp1_public_values, &sp1_vkey_hash, groth16_vk);
    println!("cycle-tracker-end: verify");

    match result {
        Ok(()) => {
            println!("Proof is valid");
        }
        Err(e) => {
            println!("Error verifying proof: {:?}", e);
        }
    }
}
Here, the proof, public inputs, and vkey hash are read from stdin. See the following snippet to see how these values are generated.
/// Generates the proof, public values, and vkey hash for the Fibonacci program in a format that
/// can be read by `sp1-verifier`.
///
/// Returns the proof bytes, public values, and vkey hash.
fn generate_fibonacci_proof() -> (Vec<u8>, Vec<u8>, String) {
    // Create an input stream and write '20' to it.
    let n = 20u32;

    // The input stream that the program will read from using `sp1_zkvm::io::read`. Note that the
    // types of the elements in the input stream must match the types being read in the program.
    let mut stdin = SP1Stdin::new();
    stdin.write(&n);

    // Create a `ProverClient`.
    let client = ProverClient::new();

    // Generate the groth16 proof for the Fibonacci program.
    let (pk, vk) = client.setup(FIBONACCI_ELF);
    println!("vk: {:?}", vk.bytes32());
    let proof = client.prove(&pk, stdin).groth16().run().unwrap();
    (proof.bytes(), proof.public_values.to_vec(), vk.bytes32())
}
Note that the SP1 SDK itself is not
no_stdcompatible.
Advanced: verify_gnark_proof
sp1-verifier also exposes Groth16Verifier::verify_gnark_proof and PlonkVerifier::verify_gnark_proof,
which verifies any Groth16 or Plonk proof from Gnark. This is especially useful for verifying custom Groth16 and Plonk proofs
efficiently in the SP1 zkVM.
The following snippet demonstrates how you might serialize a Gnark proof in a way that sp1-verifier can use.
// Write the verifier key.
vkFile, err := os.Create("vk.bin")
if err != nil {
    panic(err)
}
defer vkFile.Close()

// Here, `vk` is a `groth16_bn254.VerifyingKey` or `plonk_bn254.VerifyingKey`.
_, err = vk.WriteTo(vkFile)
if err != nil {
    panic(err)
}

// Write the proof.
proofFile, err := os.Create("proof.bin")
if err != nil {
    panic(err)
}
defer proofFile.Close()

// Here, `proof` is a `groth16_bn254.Proof` or `plonk_bn254.Proof`.
_, err = proof.WriteTo(proofFile)
if err != nil {
    panic(err)
}
Public values are serialized as big-endian Fr values. The default Gnark serialization will work
out of the box.
Wasm Verification
The example-sp1-wasm-verifier demonstrates how to
verify SP1 proofs in wasm. For a more detailed explanation of the process, please see the README.
Common Issues
Rust Version Errors
If you are using a library that has an MSRV specified, you may encounter an error like this when building your program.
package `alloy v0.1.1 cannot be built because it requires rustc 1.76 or newer, while the currently active rustc version is 1.75.0-nightly`
This is due to the fact that your current Succinct Rust toolchain has been built with a lower version than the MSRV of the crates you are using.
You can check the version of your local Succinct Rust toolchain by running cargo +succinct --version. The latest release of the Succinct Rust toolchain is 1.81. You can update to the latest version by running sp1up.
% sp1up
% cargo +succinct --version
cargo 1.81.0-dev (2dbb1af80 2024-08-20)
A Succinct Rust toolchain with version 1.81 should work for all crates that have an MSRV of 1.81 or lower.
If the MSRV of your crate is higher than 1.81, try the following:
-
If using
cargo prove builddirectly, pass the--ignore-rust-versionflag:cargo prove build --ignore-rust-version -
If using
build_programin anbuild.rsfile with thesp1-buildcrate, setignore_rust_versionto true inside theBuildArgsstruct and usebuild_program_with_args:#![allow(unused)] fn main() { let args = BuildArgs { ignore_rust_version: true, ..Default::default() }; build_program_with_args("path/to/program", args); }
alloy_sol_types Errors
If you are using a library that depends on alloy_sol_types, and encounter an error like this:
perhaps two different versions of crate `alloy_sol_types` are being used?
This is likely due to two different versions of alloy_sol_types being used. To fix this, you can set default-features to false for the sp1-sdk dependency in your Cargo.toml.
[dependencies]
sp1-sdk = { version = "3.0.0", default-features = false }
This will configure out the network feature which will remove the dependency on alloy_sol_types and configure out the NetworkProver.
Stack Overflow Errors + Bus Errors
If you encounter any of the following errors in a script using sp1-sdk:
# Stack Overflow Error
thread 'main' has overflowed its stack
fatal runtime error: stack overflow

# Bus Error
zsh: bus error

# Segmentation Fault
Segmentation fault (core dumped)
Run your script with the --release flag. SP1 currently only supports release builds. This is because
the sp1-core library and sp1-recursion require being compiled with the release profile.
C Binding Errors
If you are building a program that uses C bindings or has dependencies that use C bindings, you may encounter the following errors:
cc did not execute successfully
Failed to find tool. Is `riscv32-unknown-elf-gcc` installed?
To resolve this, re-install sp1 with the --c-toolchain flag:
sp1up --c-toolchain
This will install the C++ toolchain for RISC-V and set the CC_riscv32im_succinct_zkvm_elf environment
variable to the path of the installed riscv32-unknown-elf-gcc binary. You can also use your own
C++ toolchain be setting this variable manually:
export CC_riscv32im_succinct_zkvm_elf=/path/to/toolchain
Compilation Errors with sp1-lib::syscall_verify_sp1_proof
If you are using the sp1-lib::syscall_verify_sp1_proof function, you may encounter compilation errors when building your program.
  [sp1]    = note: rust-lld: error: undefined symbol: syscall_verify_sp1_proof
  [sp1]            >>> referenced by sp1_lib.b593533d149f0f6e-cgu.0
  [sp1]            >>>               sp1_lib-8f5deb4c47d01871.sp1_lib.b593533d149f0f6e-cgu.0.rcgu.o:(sp1_lib::verify::verify_sp1_proof::h5c1bb38f11b3fe71) in ...
  [sp1]
  [sp1]
  [sp1]  error: could not compile `package-name` (bin "package-name") due to 1 previous error
To resolve this, ensure that you're importing both sp1-lib and sp1-zkvm with the verify feature enabled.
[dependencies]
sp1-lib = { version = "<VERSION>", features = ["verify"] }
sp1-zkvm = { version = "<VERSION>", features = ["verify"] }
sp1-sdk rc Version Semver Errors
When using release candidate (RC) versions of sp1-sdk (such as 3.0.0-rc1), you might face compilation errors if you upgrade to a newer RC version (like 3.0.0-rc4) and then try to downgrade back to an earlier RC version (such as 3.0.0-rc1).
This issue arises because some RC releases introduce breaking changes that aren't reflected in their version numbers according to Semantic Versioning (SemVer) rules. To fix this, you need to explicitly downgrade all related crates in your Cargo.lock file to match the desired RC version.
To start, verify that the sp1-sdk version in your Cargo.lock file differs from the version specified in your Cargo.toml file:
% cargo tree -i sp1-sdk
sp1-sdk v3.0.0-rc4 (/Users/sp1/crates/sdk)
├── sp1-cli v3.0.0-rc4 (/Users/sp1/crates/cli)
├── sp1-eval v3.0.0-rc4 (/Users/sp1/crates/eval)
└── sp1-perf v3.0.0-rc4 (/Users/sp1/crates/perf)
After confirming the version of sp1-sdk in your lockfile, you can downgrade to a specific RC version using the following command. Replace 3.0.0-rc1 with the desired version number:
% cargo update -p sp1-build -p sp1-sdk -p sp1-recursion-derive -p sp1-recursion-gnark-ffi -p sp1-zkvm --precise 3.0.0-rc1
This command will update the Cargo.lock file to specify the lower RC version, resolving any version conflicts and allowing you to continue development.
Usage in CI
Getting started
You may want to use SP1 in your Github Actions CI workflow.
You first need to have Rust installed, and you can use actions-rs/toolchain for this:
- name: Install Rust Toolchain
  uses: actions-rs/toolchain@v1
  with:
    toolchain: 1.81.0
    profile: default
    override: true
    default: true
    components: llvm-tools, rustc-dev
And then you can install the SP1 toolchain:
- name: Install SP1 toolchain
  run: |
    curl -L https://sp1.succinct.xyz | bash
    ~/.sp1/bin/sp1up
    ~/.sp1/bin/cargo-prove prove --version
You might experience rate limiting from sp1up. Using a Github Personal Access Token (PAT) will help.
Try setting a github actions secret to your PAT, and then passing it into the sp1up command:
- name: Install SP1 toolchain
  run: |
    curl -L https://sp1.succinct.xyz | bash
    ~/.sp1/bin/sp1up --token "${{ secrets.GH_PAT }}"
    ~/.sp1/bin/cargo-prove prove --version
Speeding up your CI workflow
Caching
To speed up your CI workflow, you can cache the Rust toolchain and Succinct toolchain. See this example
from SP1's CI workflow, which caches the ~/.cargo and parts of the ~/.sp1 directories.
- name: rust-cache
  uses: actions/cache@v3
  with:
    path: |
      ~/.cargo/bin/
      ~/.cargo/registry/index/
      ~/.cargo/registry/cache/
      ~/.cargo/git/db/
      target/
      ~/.rustup/
      ~/.sp1/circuits/plonk/ # Cache these if you're generating plonk proofs with docker in CI.
      ~/.sp1/circuits/groth16/ # Cache these if you're generating groth16 proofs with docker in CI.
    key: rust-1.81.0-${{ hashFiles('**/Cargo.toml') }}
        restore-keys: rust-1.81.0-
runs-on for bigger instances
Since SP1 is a fairly large repository, it might be useful to use runs-on
to specify a larger instance type.
RV32IM Deviations
SP1 does not conform exactly to the official RISC-V RV32IM specification. Instead, it includes several minor modifications tailored to make it more suitable for use in proving systems. These deviations are outlined below:
- Addresses
0x0to0x20are reserved for registers. Writing to these addresses will modify register state and cause divergent behavior from the RISC-V specification. - Memory access is only valid for addresses
0x20, 0x78000000. Writing to any other addresses will result in undefined behavior. The heap allocator is also constrained to these addresses. - Memory access must be "aligned". The alignment is automatically enforced by all programs compiled
through the official SP1 RISC-V toolchain.
- LW/SW memory access must be word aligned.
- LH/LHU/SH memory access must be half-word aligned.
- LW/SW memory access must be word aligned.
- LH/LHU/SH memory access must be half-word aligned.
- The ECALL instruction is used for system calls and precompiles. Only valid syscall IDs should be called, and only using the specific convention of loading the ID into register T0 and arguments into registers A0 and A1. If the arguments are addresses, they must be word-aligned. Failure to follow this convention can result in undefined behavior. Correct usages can be found in the
sp1_zkvmandsp1_libcrates.
Security Considerations
While the deviations from the RISC-V specification could theoretically be exploited to cause divergent execution, such scenarios require a deliberately malicious program. The SP1 security model assumes that programs are honestly compiled, as malicious bytecode could otherwise exploit program execution and I/O.
These security concerns regarding divergent execution have been reviewed and discussed with external security researchers, including rkm0959, Zellic, samczsun, and others.
Building Circuit Artifacts
To build the production Groth16 and PLONK Bn254 artifacts from scratch, you can use the Makefile inside the prover directory.
cd prover
RUST_LOG=info make build-circuits